Hidden Hellebores

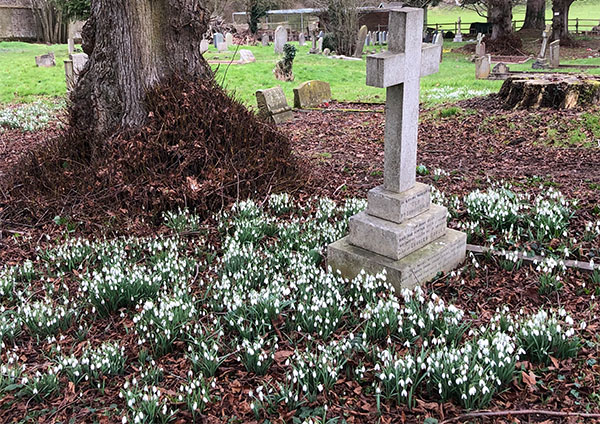
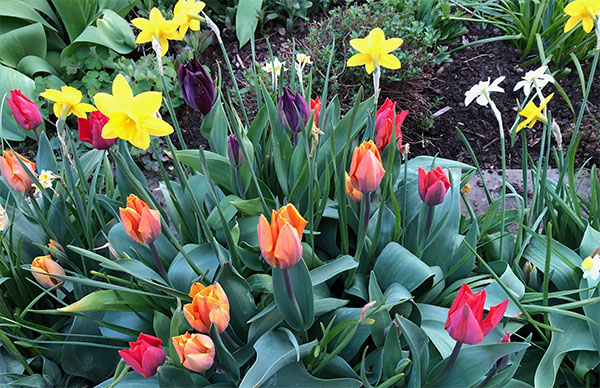
March may be filled with the sunny glow of the daffodil, but it has a loyal compatriot in the tough, cold-hardy Hellebore. These harbingers of Spring thrive side-by-side in the flower borders around my pond, and together with the early-evening song of a vociferous blackbird, they mark the turning of the season.

A perfect combo – hellebores and daffodils

A perfect combo – Hellebores and daffodils

Hellebores have a demure charm, with gently nodding heads that hide their true glory. But the blooms can become hidden among the large saw-toothed leathery leaves, which turn an unsightly crispy brown as they age. 

Remove old leaves from Hellebores to reveal the blooms

Old leaves on Hellebores turn brown and crispy as they age
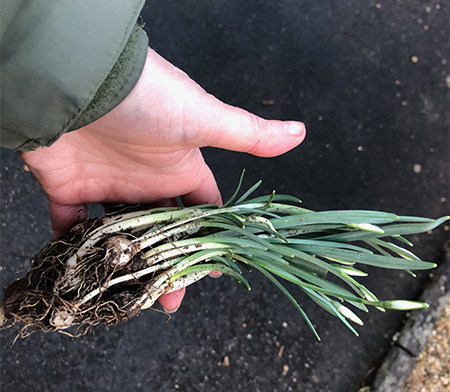
Remove old leaves

So remove the old leaves now, if you haven’t done so already. This will give pollinators better access to the flower heads and reduce the likelihood of Hellebore leaf spot, a fungal disease that pock marks the flowers with black spots.

Hellebore leaf spot is caused by the fungus Microsphaeropsis hellebori

Hellebore leaf spot is caused by the fungus Microsphaeropsis hellebori

If, like me, you already have this problem on some of your plants, then the only solution is to remove and destroy all the infected leaves and blooms (there is no chemical solution). If you leave infected material around the plant, it will be a source of repeat infection next year.

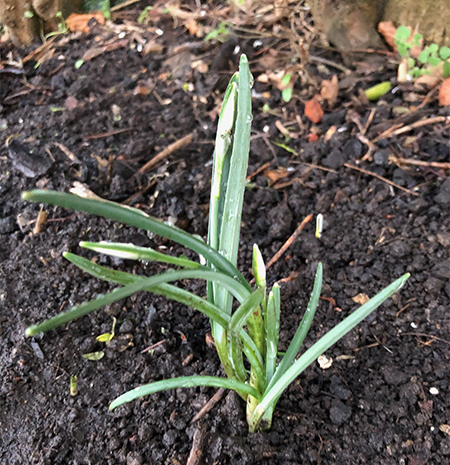
So give your Hellebores a tidy up early in the season (it’s an easy #15greenmins job) and enjoy their magnificence.

The glory of Hellebores revealed

The glory of Hellebores revealed

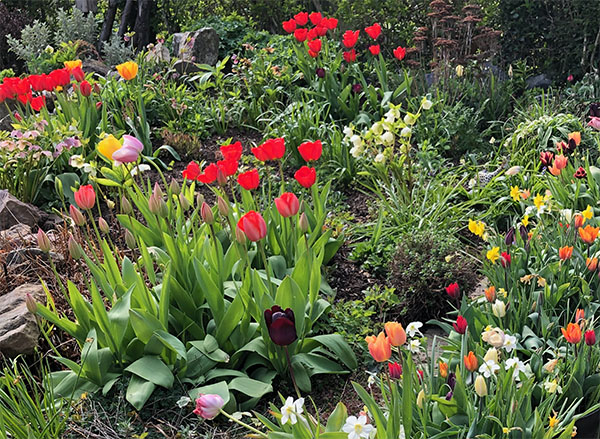
Hellebores favour a humous-rich soil in shade or part-shade with good drainage, but I’ve found they flourish in full sun as well. With hundreds to choose from, including double blooms and freckled varieties, if you don’t have a Hellebore in your garden yet, get one! I guarantee you’ll be hooked.

Persevering with snowdrops: planting in the green

A few years ago there weren’t any snowdrops in my garden. I started by planting some dry bulbs in autumn, but when they failed to emerge the following year I did my research and began to plant snowdrops ‘in the green’ in the hope that one day I would have a dazzling display, the envy of every galanthophile.

I’ve planted a few clumps every year for about 5 years now and, to be honest, it’s still a battle to get them to grow. They certainly haven’t spread into the carpets of snowdrops that I long for.

Carpet of snowdrops in churchyard
The vision: a carpet of snowdrops (but without the headstones)

Although the individual clumps have got bigger.

A decent-sized clump of snowdrops

Drying out

I expect this is because the foundation of my soil is clay. Despite all the organic material I add, it has a tendency to dry out in dry summers – and we’ve certainly had a few dry summers! Unlike daffodils and tulips, snowdrop bulbs do not have a water-retaining skin, so they dry out very quickly. And a dry snowdrop bulb is a dead snowdrop bulb. So, thinking about, I should just be grateful I’ve got any snowdrops after last summer’s soaring temperatures.

But I keep persevering, as nothing else in the garden puts a smile on my face in January and February quite like a bunch of snowdrops does. And I have a few decent clumps dotted around the garden now.

I'll keep planting snowdrops in the green, because every clump that surfaces the following year is so worth it
I’ll keep planting snowdrops in the green, because every clump that surfaces the following year is so worth it

Curbside snowdrops

This week, I handed over another tenner at my local garden centre for 3 more bunches of snowdrops in the green.

You can buy snowdrops in the green from garden centres, or order them online

I split each clump down into three smaller clumps…

Planting snowdrops in the green

And dotted them under the hedge along the curbside in the front garden.

Plant snowdrops in the green and water well

They’ve got quite a few buds on them, so I might even get a few flowers this year.

So, I will keep persevering with snowdrops. How can I resist?!

Clump of snowdrops
Guaranteed to put a smile on my face

Are you having success with snowdrops? If so, I’d welcome any tips!

Can you plant spring bulbs in January?

The quick answer is yes (well, daffodils and tulips, at least). I always plant spring bulbs in my patio pots later than recommended, mostly because I can’t plant them until I’ve lifted my dahlias out. Last year, the dahlias were still flowering in early November, which pushed my timings even later than usual.

So here I am in the middle of January, with bags of bulbs in the shed still. In general, spring bulbs are incredibly resilient, but they need at least 6 weeks of wintry weather to put their roots down before flowering. Planting them now means that they should still grow but they will flower later than usual.

This is definitely the case for tulips and daffodils. I have planted them in January before and still got a decent display in mid to late spring. A few of the daffodils may come up ‘blind’ though (foliage but no flowers). Also, the daffodils and tulips may well bloom at the same time.

Spring bulbs starting to emerge
Daffodils and tulips may emerge at the same time…
Daffodils flowering at the same time as tulips
…and flower at the same time

The jury is out on irises. It may well be too late to plant them, as they often start flowering in February, but seeing as I’ve got them I might as well plant them and see what happens. They’re certainly not going to flower in the shed.

Iris reticulata
Iris reticulata: a gorgeously uplifting flower in February

Check your bulbs

Before planting, make sure your bulbs are firm. Discard any that have gone soft or mouldy. If there’s just a bit of mould on the outside, and it hasn’t affected the firmness of the bulb, scrub it off with a hard-bristled brush. If the bulbs have started to sprout, be careful not to damage the growing tips when you plant them.

Layering bulbs in pots

By layering spring bulbs in pots – see Bulb lasagne – you can get a display that lasts for several months. First, I work out which bulbs I am going to plant in each pot.

Selection of different spring bulbs to  layer in a pot
A selection of spring bulbs to layer in a pot

Tulips bulbs should be planted first, at about 8 inches (20 cm) deep. I use peat-free compost, with a little grit mixed in to improve the drainage. This year I’ve planted a mix of 3 varieties: Prinses Irene, Havran and Couleur Cardinal).

Tulip bulbs planted in a pot 8 inches deep
Layer 1: Tulip bulbs, planted about 8 inches (20 cm) deep

Cover the tulip bulbs with a 2-inch (5 cm) layer of compost, and then plant a layer of daffodil bulbs about 6 inches (15 cm) deep. I’ve got a mix of narcissi bulbs that I lifted and stored last year, but I lost the labels so it will be interesting to see what comes up.

Mixed daffodil bulbs planted in a pot about 6 inches deep
Layer 2: Mixed daffodil bulbs, planted about 6 inches (15 cm) deep

Cover the daffodil bulbs with another 2-inch (5 cm) layer of compost, and then plant iris reticulata 4 inches (10 cm) deep.

Bulb lasagne, layer 3, dwarf irises
Layer 3: dwarf irises, planted near the top of the pot

Finish off with a final layer of compost.

Late planting works for tulips

December/January is a particularly good time to plant tulip bulbs. If you plant them too early and they sit in warm, wet conditions they are susceptible to fungal diseases, particularly something called ‘tulip fire’. The leaves become withered and distorted and are covered in brown spots. In the past few years, I have never planted tulips before December and it seems to work well.

Pick up a bargain and get planting

By planting slightly later than the ‘the norm’, you may even be able to pick up a bargain load of bulbs, as online retailers and garden centres will be looking to clear their stocks. So, as soon as the ground defrosts (!), get those bulbs in. Don’t forget to share your results.

It's worth planting those spring bulbs, even in January: bloomin' lovely
It’s worth planting bulbs, even in January, for lovely displays of spring colour

How to chase the January gardening blues away

It’s raining – again! I know I shouldn’t complain, especially after the hot dry summer we had last year, but there are jobs in the garden that are starting to get a bit desperate (I’ve still got spring bulbs to plant!) and I can’t get near them without creating a big muddy mess.

Rainy day in January
Stuck inside on another wet and windy day

So, what can we do on the days when the weather completely stops us from stepping outside? For me, it’s all about the dreaming and planning – places to go, people to see, and how I would like this year’s garden to look.

‘Wish list’ plants

If you’re a plantaholic like me, you’ve probably got a long list of botanical beauties you would like to introduce to your garden. My wish list has a tendency to grow a little longer each time a plant catalogue drops through the door and after every episode of Gardener’s World! But I’ve also got to be realistic – there’s only so much room out there, so if I’m going to buy something new I need to know where I’m going to put it.

Packed garden borders
There’s always room for one more plant, right? Erm, maybe.

Top of my wish list for a while now has been a crab apple tree. They are often cited as ideal compact trees for small gardens, providing year-round interest with their colourful blossom, fruits and foliage. Nevertheless, I haven’t had the space…until now. At the end of last year we removed a large conifer hedge from one side of the garden, which may have opened up a potential spot.

It means I can now start researching crab apples again. There’s a terrific review on Gardens Illustrated of the best crab apple trees for colour and form by plant expert Graham Rice. I’ll let you know if I manage to squeeze one in!

Sowing and growing

Wet and windy days provide a great opportunity for sorting through those seed packets and working out what you’re going to grow this year. Make a plan of what you would like to grow from seed, what month you need to sow it, and where you are going to grow it. There’s oodles of advice online to help with this.

Organized seed packets
Check what seeds you’ve already got before buying more

I always tend to get sidetracked with my herbaceous borders, but I’m hoping to try to focus more on the vegetable plot this year and widen my veg-growing horizons beyond tomatoes, courgettes and potatoes. Watch this space!

Places to visit

Some of the best inspiration comes from visiting other gardens. Last year, I visited two gardens in West Sussex: Nymans and the Sussex Prairie Garden. It was a fabulous day out, and the awesome summer borders in both gardens gave me lots of ideas for planting combinations.

So, while I’m stuck indoors I’m making a list of gardens close to home to nurture my botanical soul in 2023. I’ve already found a few gems that I wasn’t previously aware of. Check out the Great British Gardens website for some inspiration near you!

Adapting plans from lessons learned

It’s all very well making plans for the rest of the year, but it’s also good to reflect on what did and didn’t work last year. Given the incredibly dry summer we had, I am seriously considering not planting hanging baskets this year. They needed constant watering, which was unfair on my kind neighbour when I was away.

I am also considering swapping growbags for larger pots to grow my tomatoes in this year. Growbags have worked wonderfully up to now, but they often needed watering twice a day through July and August last summer, and if hot summers become a trend then that’s not sustainable.

Keep dreaming

Whatever you are dreaming of, or planning for, this year, enjoy the process. I’ve just noticed the rain has stopped…so I’m heading out into the garden to see what I can tick off my January checklist.