How to use your autumn leaves

Autumn leaves

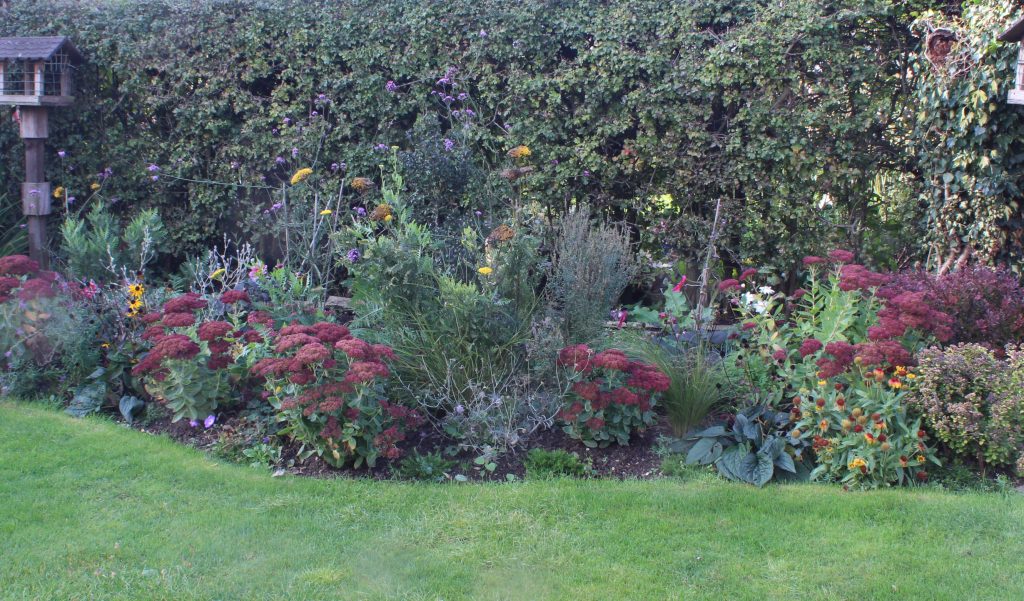
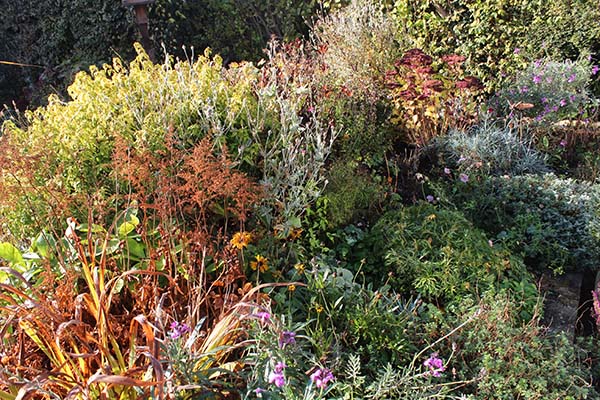
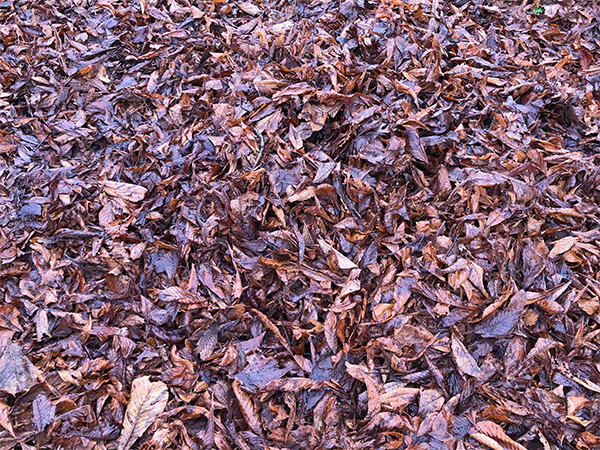
With all the wet and windy weather we’ve been having lately, the autumn leaves have been falling thick and fast, gathering in slick clumps on my patio, lawn and borders. It’s tempting to leave them be. After all, it’s the natural cycle of things, right? But there are good reasons to rake them up and recycle them in a different way.

First, they definitely need sweeping up from any hard landscaping, like paths or patios, mostly to prevent them from becoming slippy and dangerous, but also to stop them from blocking drains, which can cause flooding.

But what about the leaves on your lawn and borders?

Reasons to get raking

Too many leaves in one place will:

  • block sunlight and air from getting to your plants
  • trap moisture, enabling mould or disease to develop and/or causing the plants underneath to rot.

So, I rake them up and turn them into my own (free) soil improver that I can use when and where I want.

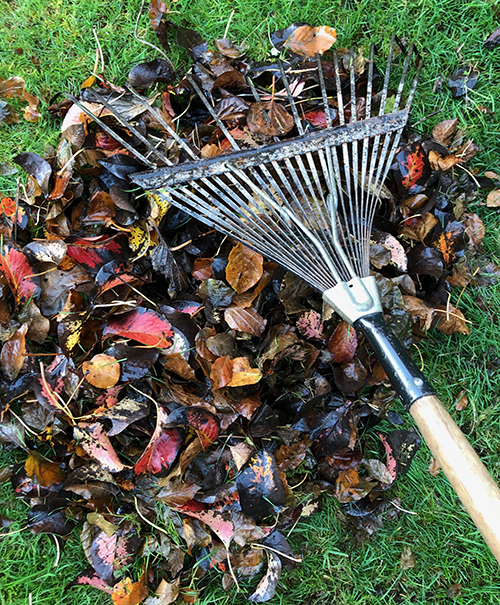
I’m not a big fan of leaf blowers. They’re noisy and use fuel. But fair enough if you’ve got a huge area and lots of leaves to clear. Given the size of my garden, my tool of choice is a sprung flat-tined garden rake. It does the job quietly and efficiently, plus raking is a fabulous way of burning calories. If I’m feeling a bit chilly, 5 minutes of raking is guaranteed to warm me up!

Raking leaves
A sprung flat-tined garden rake is my tool of choice

Composting

Most of the leaves that I collect end up in the compost bin. They are a terrific source of ‘brown material’ for the bin. If you don’t know what I mean by this, have a read of my blog post on Compost composition to get the the right ratio of ‘greens’ to ‘browns’.

Add leaves to your compost heap
Leaves are a great type of ‘brown’ material to add to your compost heap

Making leaf mulch

Another option is to make leaf mulch, which is really easy.

  1. Place the leaves in a black plastic bag.
  2. Give them a good soak (if not already wet).
  3. Puncture the bottom of the bag with a few holes for drainage.
  4. Tie the bag up and leave in a hidden corner of the garden.

The leaves will rot down into a nutritious mulch, ready for use in your borders next spring. IMPORTANT NOTE: make sure the leaves are wet before sequestering them away. I made the mistake of bagging up dry leaves the first time I tried this and nothing happened!

Dry leaves don't break down
Don’t bag up dry leaves – nothing will happen!!

The leaves are likely to break down quicker if you chop them up into smaller pieces before bagging them. You can do this by running a mower over them first, but only do this if they are dry or they will clog up your mower!

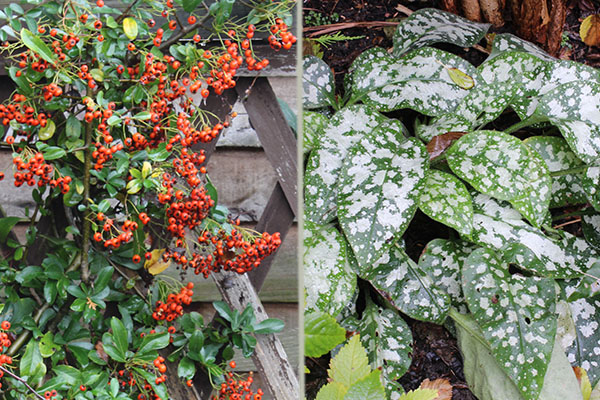
Wildlife-friendly leaf piles

Finally, leaf piles are fabulous for attracting wildlife to your garden. They provide shelter for all sorts of animals, such as small mammals, frogs and insects, and provide a good site or materials for hibernating hedgehogs. They are also a great source of food for birds, which will flick the leaves everywhere in search of grubs and insects.

Rake the leaves into a sheltered, quiet area of the garden, so that the leaves stay dry and don’t blow around everywhere, and you won’t disturb the residents.

Happy raking!

Where do bumblebees go during winter?

This week, in a rare rain-free 15 minutes in the garden, I unearthed a couple of red-tailed bumblebees (Bombus lapidarius) from an old wooden trough that had gone rotten. They appeared to have been completely submerged in the soil among the roots of a woody lavender, and they were not at all happy about being disturbed.

Red-tailed bumblebee (Bombus lapidarius)
One red-tailed bumblebee (Bombus lapidarius), rudely disturbed from its winter hibernation

There was a lot of frantic buzzing and stumbling around as they shook off the soil and tried to get their bearings from what, presumably, had been the start of a long, sleepy hibernation. It got me thinking…where do all the bumblebees go at this time of year?

Bumblebee life cycle

A quick session with Mr Google brought me up to speed on the life cycle of bumblebees, which starts with the emergence of a queen bee in spring. She establishes a nest and lays about a dozen eggs that hatch into sterile female worker bees. Some of the workers guard or clean the nest, while others forage for pollen and nectar to feed further broods of workers through late spring and early summer.

I’ve made a concerted effort in recent years to only introduce pollinator-friendly plants to the garden, so during the summer my borders are buzzing with worker bees.

A summer smorgasbord of pollinator-friendly plants

In late summer, the queen starts to produce fertile females (next year’s queen bees) and males, which leave the nest. The males mate with new queens from other nests. They die before the start of winter, as do the worker bees and original queen bee.

The newly mated queens then find a cool, quiet place to hibernate, where they will use reserves of energy stored as fat in the body to see them through the winter. Typically, they burrow into soft soil in North-facing banks, or find shelter under logs or stones, to avoid being warmed up by the winter sun.

Winter-flying bumblebees

Any increase in temperature could bring the queens out of hibernation. With our seasons getting more confused (I’ve already spotted some daffodils emerging!) and our winters getting warmer, we are likely to see more and more queen bees out and about during the winter months. In fact, in milder southern counties of the UK, some queen bumblebees, particularly the buff-tailed species (Bombus terrestris), don’t hibernate at all. Instead, they choose to start a new nest early, particularly in areas where there is a rich supply of pollen and nectar from winter-flowering plants.

Mahonia in bud: a rich supply of nectar through the winter months

I often see bees on my Mahonia in December and January. It’s a wonderful winter-flowering plant that blooms through several of the coldest months. Other good sources of bee food during the winter include winter-flowering heathers, evergreen clematis (Clematis cirrhosa) and the winter honeysuckle (Lonicera fragrantissima).

What to do if you find a hibernating bumblebee

If you unearth a hibernating queen bee by mistake and she isn’t very active, the Bumblebee Conservation Trust recommends covering her up again (loosely, so that she can get out!). Otherwise, place her in a sheltered place so that she can rest before finding a new hibernation site.

As for my two angry bees, I couldn’t return them to their original site (as I had demolished it), and they were way too active anyway, so I gently transferred them onto a late-flowering scabious where they could feed and rest before finding a new spot in which to see out the winter.

This rain- and wind-battered Scabious is still going strong in November!
This rain- and wind-battered scabious is still going strong in November!

Bee happy

Although I’m sure to see one or two bumblebees over the next few months, I will miss the sound of buzzing in the garden and look forward to the return of the workers in spring. Until then, I will have to make do with my new doormat, which makes me smile every time I come into the house. Trouble is, it’s way too pretty to wipe my feet on it!

New front doormat keeps me smiling...Bee Happy!
My new front doormat makes me smile…Bee Happy!

Autumn triumph

It’s been a pretty wet autumn so far. Actually, that’s an understatement, the garden is not just rehydrated, it’s sodden. Yet it is also glorious.

autumn_garden
Even on a wet, grey day my garden is resplendent with autumnal colour

Even through the rainfall and under the darkest of grey clouds the rich colours of the season are making their mark. In the borders, the deepening magenta hues of repeating Sedums are linked by sunny yellow accents of Rudbeckia and Achillea, while the flourishing lilac tips of Verbena bonariensis, swaying discretely above neighbouring perennials, look almost fluorescent in the dull light of another cloudy day.

autumn_border
Accents of autumnal colour in the perennial border

In dark shadows under trees, vibrant Pyracantha berries and the marbled leaves of Pulmonaria vie for attention …

pyracantha_pulmonaria
Pyracantha and Pulmonaria brighten up shady areas

… while patio pots of summer displays still brimming with Begonia ‘Glowing Embers’ and neon-pink Impatiens (busy lizzies) compete for the title of ‘Best in Show’.

begonia_impatiens
Begonia ‘Glowing Embers’ and neon-pink Impatiens

It may be wet and windy out there, but my garden is still giving its all. When the rain finally abates the pre-Winter rejig and tidy up will begin, but until then I’m enjoying everything my garden has to offer this autumn.

My must-have Sedum

No matter what else happens in my garden there is one plant that I couldn’t be without: Sedum spectabile, or as I should now call it Hylotelephium spectabile. (Botanists at the RHS have changed the scientific name of this class of hardy herbaceous perennials, but I suspect most gardeners will continue to refer to them as Sedums for some time to come.)

Hylotelephium spectabile - A border Sedum to you and me

Hylotelephium spectabile – a Sedum to you and me

The ‘Sedums’ (also known as stonecrops or ice plants) are an easy-to-grow, low maintenance group of succulents that provide year-round interest in borders.

All-year interest

In Spring, the first shoots form a thick clump of fleshy blue-grey leaves. These grow into a large discrete clump through Summer, eventually producing thick erect stems, which are fairly self-supporting, up to 50 cm tall, bearing flat clusters of green buds.

Pile the mulch around your herbaceous plants, up to 2 inches think and up to the bases

In Spring, new growth appears as shallowly scalloped whorls of fleshy blue-grey leaves

Sedum spectabile is at its most spectacular in Autumn, when the buds gradually open to reveal large flat clusters of tiny pink flowers that deepen to a radiant magenta as the season progresses.

Sedum spectabile is at its most spectacular August to October

Sedum spectabile is at its most spectacular August to October

In Winter, the flower heads gradually turn russet-brown. Left standing, these large stately heads add interesting structure to otherwise bare borders, provide protection for hibernating insects and look magnificent on frosty mornings, topped with a sparkling sugar coating.

Frost-capped sedum

Frost-capped sedum

Simply cut down the stems at the end of winter and start the cycle all over again.

I love this plant because …

  • It is ideal in borders, providing interest throughout the year
  • It is hardy to -20 degrees
  • It is drought tolerant (particularly useful this year!)
  • It is easy to propagate (see below)
  • Bees and butterflies love it!!

Sedum care

Sedums do best in light, free-draining soils, but thrive even in my heavy clay borders, although I admit I do add plenty of organic matter whenever I can to improve the soil.

They like full sun, and when fully established they rarely require watering.

If your stems get a bit floppy (this can happen if the soil is too rich) then cut them back by half in May. This will encourage stronger, shorter, self-supporting stems, although they will flower a little later than usual.

Best of all, once you have bought one plant you will never need to buy another, as they are extremely easy to propagate. Simply cut off a short non-flowering stem, in Spring, make a hole in the ground and pop it in. Water and leave it to do its  thing. Alternatively, wait until you have a decent-sized clump and lift and divide as you would any other herbaceous perennial.

I started with one plant and now have them repeating around the garden. No Matter what else I plant, they pull it all together … and never let me down.

I repeat my Sedums at intervals around the garden

I repeat my Sedums at intervals around the garden

Most of all, I love how the bees and butterflies forage over them in Autumn. They are a magnet to insects at this time of year when other sources of nectar are scarce.

I now have a rule for any new plants in the garden. They have to be bee friendly! So no limit on the number of Sedums.

Sedums are extremely bee friendly

Sedums are extremely bee friendly

Different types

There are many different species of Sedum (Hylotelephium), with different coloured leaves and flowers, including variegated, purple-leaved and white-flowered varieties. But Sedum spectabile remains my favourite.

What’s yours?!

Deadheading dahlias

It may be feeling distinctly autumnal right now, but if you’ve planted dahlias the good news is they will keep on flowering right through to the first frosts.

Dahlia bloom

Dahlias will flower from mid-summer to first frost, bringing welcome colour to the garden

There’s just one catch: to prolong flowering you will need to keep deadheading them, thereby encouraging the plant to produce new buds.

The only problem is it’s not always easy to distinguish a spent dahlia head from a new dahlia bud. And you don’t want to be snipping new buds off!

Spent dahlia head or new bud?

Spent dahlia head or new bud?

Identifying spent dahlia heads

If you spot an ageing flower early when there are still a few wilted petals visible, then there’s no problem. Snip it off. The difficulty arises when the old dahlia flower has lost all of its petals. The hard bulbous part at the base of the flower (the calyx) then closes over to form what looks remarkably like a bud.

However, you can tell the difference between a spent dahlia head and a new dahlia bud by the shape. A spent dahlia head is slightly conical, almost pointed (as in the example above), whereas a new bud is a more compact rounded shape (as in the example below).

A new dahlia bud is rounded and compact

A new dahlia bud is rounded and compact

If you give a new dahlia bud a squeeze it will feel firm and you may be able to see the compressed petals within waiting to explode out into a fully formed flower. If you squeeze a spent dahlia head, it will feel squishy.

Where to cut

Once you’ve identified the right heads to remove, make sure you trace down the old flower stem and cut it off where the stem intersects with a leaf.

Where to cut off spent dahlia heads

Cut spent dahlia heads off with sharp secateurs or garden scissors just above the point where the flower stem intersects with a leaf

If you cut it off directly under the dead flower head you will be left with an unsightly flowerless stem. Multiply this by several flowerless stems and your plant will start to look quite ugly. Keep it trimmed down and you will have a neat bushy plant.

Keep deadheading

It’s amazing how quickly new buds form, flower and die, so deadhead your plant as often as you can. Your dahlia will reward you with a stunning supply of colourful blooms late into autumn or even into early winter. And if you have chosen a bee-friendly variety it will be a source of much-needed nectar late into the year.

Dahlias can provide much-needed late-season nectar for bees

Dahlias can provide much-needed late-season nectar for bees

Happy snipping!

To tidy or not to tidy?

That is the question at this time of year! And I’ve decided, NOT (too much).

OK, so the lack of daylight hours has a lot to do with my decision. I work full time, so there’s little opportunity to get out amongst the flagging perennials Monday to Friday, and the idea of gardening by (super)moonlight this week has been hampered by cloud. But, let’s face it, for those of us trying to encourage wildlife into our gardens, the traditional end-of-season purge of autumnal debris is no longer the done thing.

Loosen the tidy rein

Don't tidy up autumn herbaceous borders

Autumnal chaos reigns in my borders

We’re no longer advised to ‘prepare our gardens for winter’ by slashing everything to the ground and covering it in a thick blanket of mulch. Instead, we’re encouraged to loosen the tidy rein and let nature do what nature does best. Yes, my borders may look chaotic for a few months, but that frosty dishevelled jumble of vegetation will protect the more tender perennials from frost and provide shelter for a host of beneficial insects, which in turn will offer protein-rich food for the birds.

Jobs for November

That’s not to say that I’m letting myself off the gardening hook completely this month (plus, I do enjoy getting out in the garden at this time of year). For example, it’s not a good idea to leave rotting material lying on top of perennial crowns. It can cause winter rot and will encourage slugs to hang around. So I’ll be clearing away that kind of sludgy leaf debris from the top of my hostas, and adding it to the compost heap instead.

Autumn mulch with compost

Time to put all this lovely goodness back into the soil

I’ll also be dumping plenty of compost onto the beds, where the worms and micro-organisms will work their magic over the winter, putting back some of the nutrients that the plants have taken out over the growing season.

And I will probably rake up a few leaves from the lawn and redistribute them under my shrubs to break down in a more beneficial place.

winter pile of beech leaves

Rake up leaves from the lawn and spread them under your shrubs to rot down over winter

But for the most part, I will be leaving well alone, hoping that the insects and frogs will hibernate in my leaf litter, and seeking my own refuge in front of the lounge fire.

Autumn cuttings

Is it too late to take cuttings of plants that are unlikely to survive the winter? Most of the research I’ve done online suggests that I should have got my cuttings act together earlier in the year, but I’m not convinced.

The vibrant black-eyed susan vine (Thunbergia alata)

The vibrant black-eyed susan vine (Thunbergia alata)

This eye-catching black-eyed Susan vine (Thunbergia alata) is a low-maintenance rapid-growing climber that has brought a touch of the exotic to my patio this year. Unfortunately, it is not frost hardy, and I don’t have room to bring it indoors over the winter, so I am attempting to propagate it via cuttings this autumn.

Softwood (herbaceous) stem cuttings are usually taken during the main growing season of the plant, in spring or early summer, but there is enough growth in my vine to make me think some autumn cuttings may be successful.

How to take stem cuttings

Black-eyed susan stem cutting

Black-eyed Susan stem cutting

  1. Select a section of healthy growth, and cut the stem at an angle 3–6 inches below a leaf node
  2. Cut off any leaves on the lower half of the stem so that the stem is bare for potting, and trim the cutting down to just a few leaves
  3. Place the cutting in your potting medium or, as in the case of my black-eyed Susan cuttings, in a glass of water to take root before potting them on

Stem cuttings in water

I’m leaving my cuttings in water first to take root, before potting on in compost

I’m hopeful that I’ll have a modicum of success with these, because the Argyranthemum cuttings that I took in November 2 years ago made it through the winter to produce several healthy new plants.

If you’re taking cuttings at the moment, and have any tips for success, please let me know!


Pear rust

Take my advice: if you see signs of disease on a plant, act on it straight away before it gets worse. Last month I noticed individual bright orange spots on several leaves on my conference pear tree … and I ignored them.

Orange-red spots on leaves: first sign of pear rust

Orange-red spots on upper surface of leaves: first sign of pear rust

One month later, I realised that almost a third of all the leaves on the tree were sporting this season’s colour – rusty orange-red!

Pear rust on leaves, but the fruit is unaffected

Orange spot is the new black spot – but the fruit is unaffected

On closer inspection I found some rather gruesome brown, gall-like growths on the corresponding lower side of each leaf, with alien hair-like projections.

Pear rust: warty gall on the underside of the leaves with hair-like projections

Ew! Warty gall on the underside of the leaves with hair-like projections

With the help of Mr Google, it wasn’t difficult to identify: European pear rust, caused by the fungus Gymnosporangium sabinae.

Breaking pear rust’s life cycle

Apparently, fungal rusts need a living host at all times to survive, so the life cycle of this particular nasty requires two host plants. This summer/autumn, my pear tree has played host to the fungus. Normally, it would then release spores from the underside of the leaves and restart the party on a neighbouring juniper tree. Being evergreen, the juniper would harbour the fungus though the winter, releasing spores in summer to reinfect my pear tree.

I can only hope that by painstakingly removing all the infected leaves (yes, I got on a ladder and cut off and binned every last one of the little blighters) that I have broken the cycle, but of course I may have been too late and spores may already have been released. If the culprit juniper is infected again, then my tree might well get reinfected next year and so the cycle will continue. As it is unlikely that I will be able to track down the culprit juniper, I will have to be more vigilant next year and tackle any infection as soon as it materialises.

The consequences

If left unchecked, heavy infections can reduce the yield of fruit, and I have had noticeably fewer pears this year. More worryingly, the infection can cause cankers in the bark (isolated dead areas), which can make the tree more susceptible to bacteria, fungus and insect attack.

The solution

There is no suitable fungicide available to home gardeners if you want to consume the fruit off your tree. And why have a pear tree if you’re not going to eat the pears?!

So all you can really do is try to break the cycle of  infection by removing as many of the infected leaves as possible and putting them straight in the dustbin or burning them. I appreciate that if you have a huge old pear tree this might not be practical (mine is only 4 years old).

Pear rust: bin or burn the affected leaves

Bin or burn the affected leaves

Fastidiously clear all the dropped leaves from under the tree as well. If your tree has got canker, then you’ll need to cut it out of the bark. I’m hoping I won’t get to that stage!

A healthy tree will fight off infection more effectively, so I will also be clearing around the base of my tree, and giving it some TLC over the next few months, including a good autumn mulch, a winter wash and an early spring feed. I will, of course, also ensure that it gets plenty of water, as we’ve had an exceptionally dry October so far. I’ll also be pruning the tree this winter to avoid overcrowding in the crown and improve the airflow through the branches.

Report your pear rust

Unfortunately, there has been a steady increase in pear rust in the UK over the past 10 years. In order to get a better picture of distribution, the RHS is asking anyone who comes across the disease to report it via its online survey.

If you’ve had a problem with pear rust, please let me know, especially if you have any extra tips for tackling it. Let’s hope next year brings less rust and more pears!

Beat the glut: 2 great beetroot recipes

Beetroot is really easy to grow. No matter how new you are to veg growing, it’s a sure thing. But then what do you do with all those beets?

Fresh from the veg plot: beetroot glut

Fresh from the veg plot: beetroot glut

My personal favourite is roasted beetroot and goat cheese salad, but as the autumn nights start to draw in, here are two easy peasy ways to get creative with your beetroot glut.

Spiced sweet and sour pickled beetroot

Thank you to my neighbour, Alison, for putting me on to this one. This light pickle is sweet and rich, and is the perfect accompaniment to all sorts of foods (fish, cold meats, cheeses, salad …).

Ingredients
1 kg raw beetroot
200g caster sugar
300mL white wine vinegar
200mL cold water
2 star anise
3 cloves
2 bay leaves
2 tbsp balsamic vinegar
1 tbsp olive oil

Heat your oven to 180C/160C fan/gas 4. Trim the leaves and most of the stalks off the beetroot, leaving a stump of stalk on each.

Wash and trim your beetroot before cooking

Wash and trim your beetroot before cooking

Wrap each beetroot in tinfoil and place on a baking tray. Roast for 1 hour 15 minutes or until the point of a sharp knife inserts easily into the beet. Leave to cool.

Peel the beets (and get very stained hands), and chop them into large bite-size pieces. Pack the chunks into sterilized jars.

Chop your oooked beetroot into chunks

Chop your cooked beetroot into chunks

For the pickling juice, tip the sugar, white wine vinegar, water, spices and bay leaves into a large saucepan and bring to the boil. Then simmer gently, stirring until all the sugar has dissolved, for 2 minutes. Turn off the heat and add the balsamic vinegar.

Carefully pour the spiced vinegar over the beetroot in the jars (you might have a bit left over). Leave the pickle to cool uncovered, then pour the olive oil over the top and seal the jars.

Et voila! Pickled beetroot. Simples!

Et voila! Pickled beetroot. Simples!

Officially you are only supposed to keep this in the fridge for up to a month, but mine lasted at least 2 months last year with no problems. And as a bonus, when we’d eaten all the beetroot, I mixed the leftover pickling juice with a little olive oil for a fantastic vinaigrette salad dressing.

Beetroot brownies

Forget carrot cake this autumn, try this instead. You won’t regret it.

Ingredients
500g raw beetroot
100g unsalted butter
200g bar plain chocolate (70% cocoa)
1 tsp vanilla extract
250g caster sugar
3 eggs
100g plain flour
25g cocoa powder

Cook and chop the beetroot as per the recipe above. Chop the chocolate and butter up roughly and blend with the warm chopped beets in a food processor. The chocolate and butter will melt as you blend.

Blend the beets, butter and chocolate until it is smooth red and velvety

Blend the beets, butter and chocolate until it is smooth red and velvety

Beat the sugar and eggs together in a large bowl until thick, pale and foamy. Spoon the beetroot mixture into the bowl (it doesn’t look pretty at this stage, but stay with it!), then use a large metal spoon to fold it in. Try to keep as much air in the mixture as you can.

Gently fold in the sifted flour and cocoa powder next, until you have a smooth batter. Pour the mixture into a pre-lined 20cm x 30cm tray bake or roasting tin and bake for 25 minutes or until it has risen all over with a small quiver under the centre of the crust when you shake the pan.

Cool in the tin, then cut into squares.

Beetroot brownies

Yum!

Let me know what you think, and I’d love to know your favourite beetroot recipes too. I’m sure I’ll have another glut to deal with next year.

“Will flower until frost”

With the wind and rain and noticeable drop in temperature, the garden has started to take on a rather dishevelled, limp-around-the-edges persona. The last of the summer-flowering perennials have all but shrivelled and the dampness of heavy dews lingers late into seemingly endless grey, overcast mornings. So thank goodness for those autumnal gems that “will flower until frost”.

The rich jewel tones of the autumn borders

Eye-popping autumn borders

Yes, there are still plenty of perennials and shrubs brightening the darkest corners, even in early November. Here are some of my favourites …

The colours of sunset

Pollen-rich Rudbeckia and Gaillardia splash the borders with the colours of sunset

The elegant Japanese anemone

The elegance of the Japanese anemone

Sedum splendour

Sedum splendour

Long-lived golden nasturtiums brighten gloomy corners

Long-lived golden nasturtiums brighten gloomy corners

Rich jewel tones of aster and cyclamen

Rich jewel tones of aster and cyclamen

Autumn fruit and leaf colour: Berberis berries and the changing leaves of Virginia Creeper

Autumn fruit and leaf colour: Berberis berries and the changing leaves of Virginia Creeper

So enjoy the last of the autumnal colours – in a week or so they will be all but gone.

Bulb lasagne

England would not be the ‘green and pleasant land’ that it is without the rain, but this weekend someone somewhere forgot to turn off the tap! My garden was not so much ‘green and pleasant’ as ‘soaked and soggy’, so I turned to my list of wet weather jobs and retreated to the garage to make some bulb lasagnes – no pasta involved!

The right combination

Planting spring bulbs in a pot is a great way to ensure you have a splash of colour on your patio or doorstep next year, and is ideal for even the smallest of spaces. To prolong your display, layer bulbs (hence the lasagne analogy) that will flower at slightly different times and will grow to different heights. A bit of Internet research suggested that mixed tulips, tête a tête narcissi and dwarf irises work well together, so that’s what I’ve gone for. The pictures next year will prove whether it works or not.

The technique

Take a large frost-hardy container (about 30 cm diameter) with holes in the base, and line the bottom with good drainage material (e.g. broken shards of terracotta pot, ripped-up polystyrene pieces, gravel). Add a layer of compost or bulb fibre, then plant the biggest bulbs, in this case the tulips. They can  be packed in quite closely, but shouldn’t touch. You could probably go for more bulbs than depicted here (but I was splitting bulbs between several pots so was being a bit frugal).

Bulb lasagne, layer 1, tulips

Layer 1: tulip bulbs

Cover with about 5 cm of compost and then add a layer of medium-sized bulbs – in this case tête a tête narcissi and a few standard-sized daffodils (experimenting!).

Bulb lasagne, layer 2, daffodils

Layer 2 : ‘daffodils’

Cover with another 5 cm of compost and add a final layer of the smallest bulbs (irises).

Bulb lasagne, layer 3, dwarf irises

Layer 3: dwarf irises

Add compost to the top of the pot, and water as required. You can finish off with some gravel or slate chippings, which will help to retain moisture. Shelter from frost, and keep an eye on the pot over the winter to ensure it doesn’t dry out.

Finally, as ‘patience is a virtue’, be patient, and wait for Spring.

Planting wood anemones

Anemone nemorosa produces carpets of blooms in spring

Anemone nemorosa produces carpets of blooms in spring

Today I’m planting wood anemones, a first for my garden. Wood anemones provide beautiful carpets of early-spring blooms and, provided there is access to sun, are ideal for planting in semi-shade under trees and shrubs.

Many woodland plants have bulbs or tubers that store food until it is needed to produce new growth. The two varieties of Anemone nemorosa that I’m planting (the blue-lavender ‘Robinsaniana’ and white ‘Vestal’) have fibrous rhizomes that rapidly spread through leaf litter just below the surface. In theory, once I’ve planted a few, they will then naturalize and spread year on year, as even small pieces of rhizome can make new plants.

Anemone nemorosa Vestal rhizome

Anemone nemorosa – Vestal (white) / 5 woody rhizomes planted on corner of raspberry bed, around fern, among tulip bulbs

Anemone nemorosa robinsaniana rhizome

Anemone nemorosa – Robinsaniana (lavender-blue) / 5 woody rhizomes planted under willow tree among tete-a-tete daffodil bulbs

I’m also planting Anemone blanda ‘White Splendour’ (aka Winter windflower) alongside my front driveway for an early splash of colour to lift the spirits as we come and go from the house.

Anemone blanda White Splendour corn

Anemone blanda – White Splendour / 25 corns planted in flower bed bordering driveway in between primroses and lavender

Planting instructions

Anemones should be planted at least 3-5 cm deep and no less than 10 cm apart. Wear gloves to avoid skin irritation. It is highly recommended that you soak the bulbs/rhizomes in water for 24 hours before planting. They thrive best in well-drained soil enriched with plenty of organic matter – hence the compost dig yesterday. The richer the soil, the more flowers each rhizome or tuber will produce.

Soak anemone bulbs for 24 hours before planting

Soak anemone bulbs for 24 hours before planting

Lots more useful information available at Gardening Know How.