English vs Spanish bluebells

If you have been walking in the woods over the past few weeks, chances are you have come across a quintessentially British sight: deep violet-blue carpets of English (or common) bluebells. Blooming in April and May, they are the last of the Spring flowers to emerge from the woodland floor before the leaf canopy thickens overhead and blocks out the sunlight.

Although native to Western Europe, half of the world’s common bluebells can be found in the UK, where they are a protected species. Most grow in, and on the edges of, ancient broadleaf woodlands, but they also grow in hedgerows and grassland and even on coastal clifftops.

Bluebells on the Cornish coast
Bluebells on the Cornish coast near Port Isaac

A Spanish rival

Unfortunately, the English bluebell (Hyacinthoides non-scripta) is under threat from the invasive Spanish bluebell (Hyacinthoides hispanica). The Victorians introduced the Spanish bluebell as a garden plant, but in the early 1900s it escaped beyond the garden fence. Let loose in the countryside, it has been found to outcompete and cross-pollinate with our native species to produce vigorous hybrids, particularly in urban areas.

How to tell the difference?

It is fairly easy to spot the difference between Spanish and English bluebells.

English vs Spanish bluebells, how to tell the difference
Spot the difference. (Left) English bluebell. (Right) Spanish bluebell.
EnglishSpanish
Flower colourDeep violet-blue (occasionally white)Pale blue; also pink and white
Flower shapeNarrow, tubular bells with tips that curl backOpen, conical bell, with open, spreading tips
StemsArching with flowers on one sideUpright with flowers on both sides
PollenCream-colouredBlue- or pale green-coloured
LeavesNarrow, ~1.5 cm wideBroad, ~3 cm wide
ScentSweet scentLittle or no scent
Cream-coloured pollen of English bluebell

Be plant wise

Although Spanish bluebells are very pretty and easy to grow, be aware that they are likely to outgrow their welcome in your garden. They multiply rapidly and are very deep-rooted, which makes them incredibly difficult to eradicate once established.

A few bulbs in my garden (which, to be honest, I don’t remember planting, so may have seeded in my garden from elsewhere) rapidly spread within 3–4 years throughout one of my herbaceous borders. They were lovely to look at and were a big hit with the bees, but they were complete thugs, forming dense clumps that started to smother smaller plants in the border.

So, I recently spent several hours trying to dig them all out. I found all sizes of bulbs at varying depths, and I definitely didn’t manage to remove them all. I’m sure I’ll be digging them out for several years to come.

Bluebell bulbs
Spanish bluebell bulbs of varying sizes

Tips for gardeners

  • Ideally, plant native English bluebells rather than Spanish bluebells. They grow best in free-draining soil in partial shade.
  • Buy English bluebell bulbs from reputable sources to ensure they have not been sourced from the wild.
  • Don’t plant Spanish bluebells if you live near woodland where English bluebells are growing.
  • Cut off seed heads of Spanish bluebells after flowering to stop the windborne spread of seeds outside the garden.
  • Dispose of Spanish bluebell bulbs responsibly in council garden waste collections so they don’t end up somewhere they shouldn’t be.
Bluebell seed heads
Cut off the seed heads of Spanish bluebells to prevent them spreading

Tips for walkers

  • Be aware of the law. English bluebells are a protected species, which means it is illegal to pick, uproot or damage them.
  • Stick to designated paths through woods and avoid trampling bluebells. They can take years to recover from damaging footfall.

Where to see bluebells

Both the National Trust and Woodland Trust have lots of information on where to see bluebells. If you have any recommendations for bluebell walks let me know.

A carpet of bluebells, in Strid Wood, Bolton Abbey
A carpet of bluebells in Strid Wood, Bolton Abbey, Yorkshire

Potatoes: a whole new language

A lot of gardeners have Easter marked as the time to start planting their potatoes. I guess it’s the prospect of a long weekend in the garden or on the allotment that turns our thoughts to planting spuds.

But before you start digging, do you know your ‘first earlies’ from your ‘maincrops’? Have you heard of ‘indeterminates’ and ‘determinates’? What are ‘seed potatoes’ and do you need to ‘chit’ them? Yes, the humble potato (Solanum tuberosum) comes with a language all of its own.

Freshly harvested potatoes

Seed potatoes

Seed potatoes are potatoes from last year’s harvest that you grow this year’s potatoes from. It’s fine to use a few tubers from your previous crop if they have stored well over winter and look healthy. However, using potatoes from your own crops year after year runs the risk of carrying over any disease that might be present. With that in mind, it is also important not to grow potatoes in the same soil each year, as pests and diseases are likely to build up.

In general, it’s best to use a fresh stock of seed potatoes from a garden centre or online catalogue. They will be virus free and guaranteed to give you a tasty, disease-free crop. There will also be plenty of varieties to choose from.

Potatoes chitting on a window sill
Seed potatoes guaranteed to be virus free

Although it is possible to grow potatoes from store-bought eating potatoes, you won’t get the same disease-free guarantee. If you decide to try this, make sure you buy organic as some eating potatoes are treated with a chemical that prevents sprouting.

First earlies, second earlies and maincrop potatoes

These terms simply relate to the time when you plant and harvest your potatoes. First and second earlies (new potatoes) are often planted at the same time, with second earlies being ready for harvesting a few weeks later than first earlies. Maincrop potatoes are generally planted a bit later, take longer to grow and are harvested later in the year.

When to plant potatoes

There is no hard and fast rule for when you should plant potatoes. It will depend on the temperatures in your region. Later planting (up to a couple of weeks before your last frosts) simply means later harvests, so don’t panic if you can’t start planting over the Easter weekend! As a very general guide…

First earlies can be planted around the end of March/early April for harvesting 10–12 weeks later in June/July. They are the earliest to crop, hence the name ‘first early’. Popular varieties of first early potatoes include:

  • Arran Pilot
  • Duke of York
  • Foremost
  • Orla
  • Pentland Javelin
  • Rocket
  • Sharpes Express
  • Swift

Second earlies can be planted in mid-April for harvests 14–16 weeks later from July onwards. Popular varieties of second early potatoes include:

  • Charlotte
  • Estima
  • Jazzy
  • Kestrel
  • Maris Peer
  • Ratte

Both first and second earlies tend to be small and flavoursome new potatoes, ideal for boiling and steaming. They are best eaten soon after harvest.

Main crop potatoes can be planted in mid- to late-April for harvesting after 15–20 weeks from late August onwards. Popular main crop varieties include:

  • Cara
  • Desiree
  • King Edward
  • Maris Piper
  • Navan
  • Pink Fir Apple

Maincrop potatoes tend to be bigger than first and second earlies and can be baked, roasted or fried. They also store well over winter.

Chitting

Chitting is the process of forcing seed potatoes to start sprouting a few weeks before they are planted out (see How to chit potatoes). Left in a cool dry place in the light, the ‘eyes’ of seed potatoes produce stubby sprouts called ‘stolons’. When planted below ground, the stolons grow upwards to create the new potato plant.

Chitted potatoes, ready to plant
Chitted and ready to plant

Chitting is a good way of getting early varieties off to a head start so that they get growing quickly when they are planted, but it isn’t essential.

Indeterminate versus determinate potatoes

I only discovered these terms a few weeks ago and they will completely change the way I grow my potatoes this year, as indeterminate and determinate potatoes have different growth habits.

Indeterminate potatoes produce their crop at intervals along the growing stem in multiple layers. As the plant grows up you need to keep covering the stem (‘earthing up’) so that the layers of potatoes remain underground. You need vertical space for this type of potato and they take longer to grow than determinate varieties. Most (but not all) maincrop potatoes are indeterminate.

Determinate potatoes grow in a single layer just below the seed potato in the top layer of soil. They will benefit from a layer of mulch as they grow to ensure any tubers that break through the surface are protected from the light. The plants do not grow very tall and flower earlier than indeterminate varieties. Most (but not all) early varieties are determinate.

Growing potatoes in containers

With limited veg-growing space, I’ve always grown my potatoes in sacks. For years I’ve been planting 2 or 3 potatoes deep in each sack and ‘earthing up’ around the stems as they grow, thinking that they are growing layers of potatoes. But it turns out that most of the varieties I’ve been growing are ‘determinate’ and have therefore been growing in a single layer. So, this year, I will still plant them in sacks, but I will plant 2 seed potatoes in the bottom third of the sack, then another 2 in the next third. In theory, I should get double the harvest in the same space. Result!

Potato sacks in leaf
Sacks of potatoes

Whatever type or variety of potato you decide to grow, and whether you chit or not, there is nothing more satisfying than harvesting flavoursome home-grown potatoes.

Homegrown Charlotte potatoes

So let me know what you’re growing this year and any potato-growing tips you want to share.

Hidden Hellebores

March may be filled with the sunny glow of the daffodil, but it has a loyal compatriot in the tough, cold-hardy Hellebore. These harbingers of Spring thrive side-by-side in the flower borders around my pond, and together with the early-evening song of a vociferous blackbird, they mark the turning of the season.

A perfect combo – hellebores and daffodils

A perfect combo – Hellebores and daffodils

Hellebores have a demure charm, with gently nodding heads that hide their true glory. But the blooms can become hidden among the large saw-toothed leathery leaves, which turn an unsightly crispy brown as they age. 

Remove old leaves from Hellebores to reveal the blooms

Old leaves on Hellebores turn brown and crispy as they age

Remove old leaves

So remove the old leaves now, if you haven’t done so already. This will give pollinators better access to the flower heads and reduce the likelihood of Hellebore leaf spot, a fungal disease that pock marks the flowers with black spots.

Hellebore leaf spot is caused by the fungus Microsphaeropsis hellebori

Hellebore leaf spot is caused by the fungus Microsphaeropsis hellebori

If, like me, you already have this problem on some of your plants, then the only solution is to remove and destroy all the infected leaves and blooms (there is no chemical solution). If you leave infected material around the plant, it will be a source of repeat infection next year.

So give your Hellebores a tidy up early in the season (it’s an easy #15greenmins job) and enjoy their magnificence.

The glory of Hellebores revealed

The glory of Hellebores revealed

Hellebores favour a humous-rich soil in shade or part-shade with good drainage, but I’ve found they flourish in full sun as well. With hundreds to choose from, including double blooms and freckled varieties, if you don’t have a Hellebore in your garden yet, get one! I guarantee you’ll be hooked.

When is the best time to tidy the spring garden?

When I was younger I remember my mum ‘putting the garden to bed’ at the end of each Autumn, clearing and chopping everything into neat low-cut order before the start of winter. We now know how beneficial it is to leave ‘winter structure’ in place throughout the coldest months.

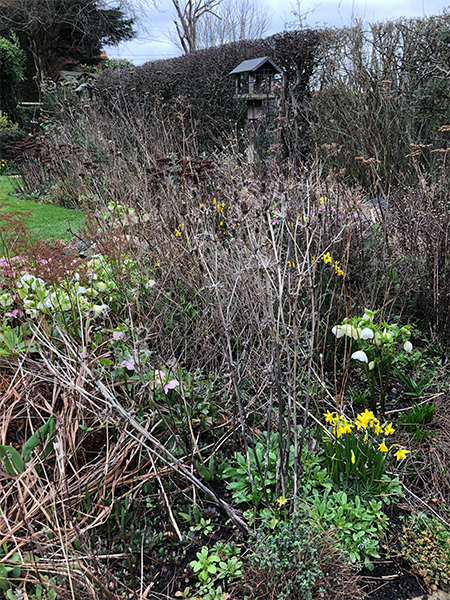
Winter structure in the garden
The winter ‘structure’ has become a bit of a tangled mess!

Protective debris

Leaving the dead stems in place protects the crowns of perennials from severe frost damage and provides an important habitat for hibernating insects. Birds will feed on old seed heads and will use some of the winter debris as nesting material in early Spring, while hedgehogs will snuggle under large piles of leaves.

Restoring order

It’s great to leave that protective canopy in place for as long as possible, particularly while we continue to get regular frosts. But, let’s be honest, frosts or no frosts, there comes a time when we’ve had enough of the dishevelled look and want to restore some order to our borders. For me, that’s about now, in mid-March, when temperatures start to hover around double digits, and daffodils and hellebores are trying to find their way through the confusion.

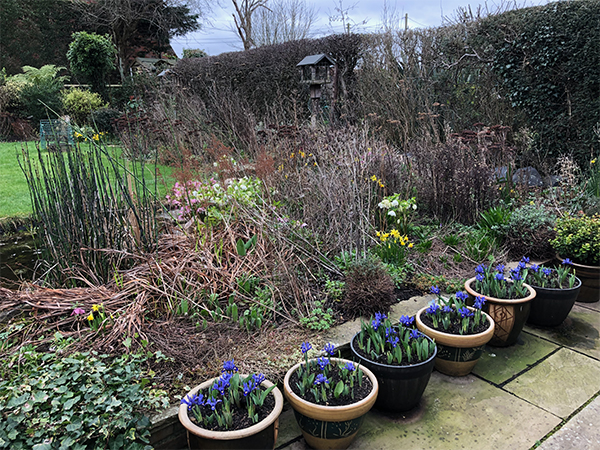
So, I’ve started to chop down the old stems and seed heads…

Time to clear wintry debris

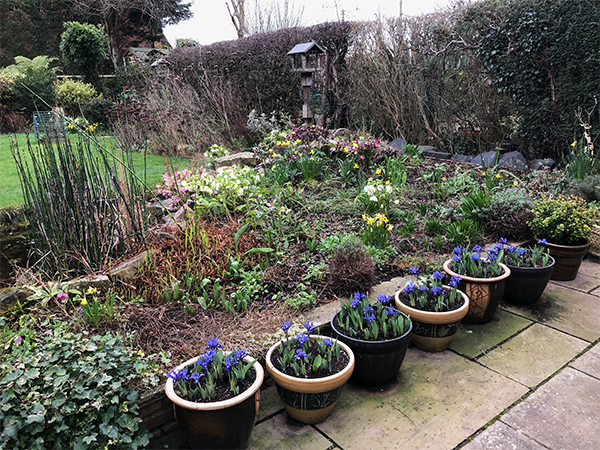
To reveal the fresh spring growth beneath…

Spring garden revealed

Early spring colour

Having cut down all the old stems (which will be shredded and added to the compost bin) in the border nearest the patio, I can now enjoy the daffodils and hellebores that are the stars of the show at this time of year.

Early spring plants
Newly revealed daffodils and hellebores

Cutting down the old stems is only the first step towards complete springtime transformation. Next, the border will need weeding (15 minutes at a time, of course), and in a few weeks time I will be able to start dividing plants and filling in any gaps.

Choosing the right time to tidy your garden

The right time to start tidying your garden this spring will depend on several factors, including:

  • where you live
  • the weather
  • the type of soil
  • when you have time to do it.

I live in the south of England, so mid-March is normally about the right time. Temperatures are starting to climb and although we still get frosts as late as May, they become less frequent. If you live further north you may prefer to wait until early to mid-April. Keep an eye on the weather forecast for your area and that will guide you. It’s looking promising here over the next few days!!

Wet clay soil is easily damaged when walked on, so I will have to wait a few more days before cutting back the perennials in the border that runs down the right-hand side of the garden. We have just had some very heavy rain and, as it can only be accessed by walking over the lawn, I would do more damage than good by repeatedly walking over, and compacting, the clay-based soil. I will have to be patient.

Meanwhile, there are plenty of other jobs to do in the garden this month.

How to divide and manage pheasant’s-tail ornamental grass

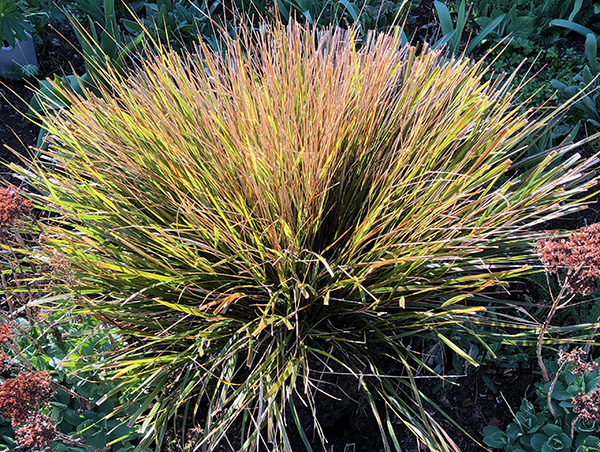
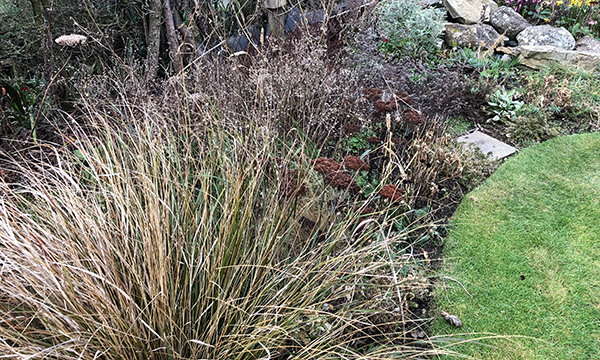
I don’t have many grasses in my garden, but a couple of years ago I acquired a small pot of, what I call, pheasant grass (Anemanthele lessoniana, syn. Stipa arundinacea), which had seeded itself in a friend’s garden. Its most common names are pheasant’s-tail grass and New Zealand wind grass. It’s a lovely ornamental grass that provides a spray of year-round colour in various hues of copper, bronze, russet and gold. It starts off as quite a loose arching spray, but (as I found out!) can form a dense clump as it matures.

Dense clump of Pheasant grass
Dense clump of pheasant grass (trimmed)

Everything I read said that it was an ideal grass for adding colour, movement and structure to a border and that it would self-seed itself (as it had done in my friend’s garden), so I popped it in my newly enlarged herbaceous border that runs down the side of the garden.

All was well for a while. Pheasant grass will thrive in any well-drained soil, in a sheltered or exposed spot. It prefers plenty of light but will do okay in partial shade as well. It was certainly happy in my sunny clay-based border, so much so that by the end of last year, 3 years after planting it, it had outgrown its welcome, swamping everything else around it.

Oversized pheasant's-tail grass
My small spray of pretty pheasant’s-tail grass had become an oversized monster

Pruning evergreen ornamental grasses

My first plan was to try tidying it up. As a grass-growing newbie, I read up on it and found that, unlike the pruning of deciduous ornamental grasses, you should never cut an evergreen ornamental grass down to the ground, as it is unlikely to recover. You need to be a bit more selective and pull out the dead stuff.

In the utopian world of expert gardeners, you can ‘run your fingers through the grass and pull out the dead bits’. I tried this briefly and nearly lost my fingertips. Ouch! Apparently, only do this with young grasses that have been well maintained with a light pruning every Spring. If you’re not sure, wear gloves, as some grasses can be razor sharp! I have the scars to prove it.

The individual strands of my congested clump of pheasant grass were thick and tough, and they didn’t come away from the base of the plant when pulled. Instead, I had to selectively prune as many of the dead strands out as I could by cutting them individually from the base with secateurs. Not easy!

I then gave the whole clump a light trim to put some shape back into it (see top photo).

Dividing evergreen ornamental grasses

It was still too big for the border, so I decided to lift and divide it. It took a fair bit of digging out, and I certainly couldn’t ‘tease it apart with back-to-back forks’, as advised by the experts. Brute force, a sharp-edged spade and a lot of swearing worked though, and I eventually managed to split it into four much more manageable clumps.

Dividing a large clump of Pheasant's-tail grass
Divide and conquer: one clump becomes four

A new home

I decided a prairie-style border wasn’t for me (I’m more of a cottage garden kind of girl), so I have made room for a much more manageable lupin (which the slugs will probably eat), and rehomed the new clumps of pheasant grass at the back of a border in the front garden. It will be interesting to see how they fair. I fear it might be too late, as the grass has become very congested, but I’m giving it a chance.

Rehomed clumps of pheasant's tail grass
Rehomed clumps of pheasant’s-tail grass

Lessons learned

I now know that you need to do a little light pruning of perennial evergreen grasses every Spring, pulling out the dead strands. If they self-seed, you can replace older plants with the seedlings. Tougher clumps (like mine) can be sawn apart if necessary. In theory, division should reinvigorate the plant. We’ll see!

North-facing curbside makeover

While I enjoy taking 15-minute breaks from my desk during the week, the weekends are an opportunity to tackle larger projects.

My front garden is a small plot, roughly 9 x 7 metres, next to the driveway. It comprises a squarish lawn, with borders that are mostly planted with shrubs and conifers, and is enclosed by two beech hedges. I confess, the back garden gets a lot more attention, so I’ve decided to give the front a bit more TLC this year, starting with the curbside view.

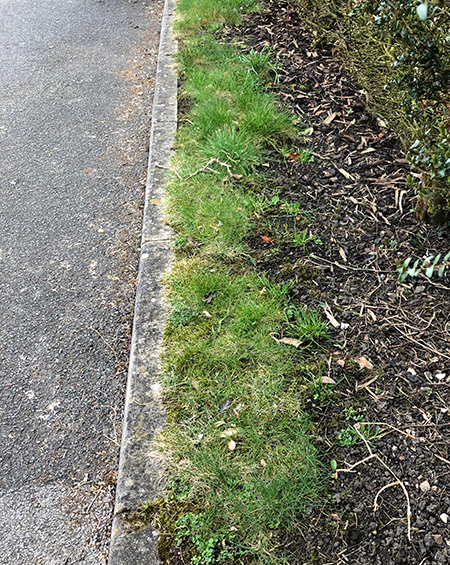
There used to be a 1-foot strip of grass in between the front beech hedge and roadside curb, but over the years it has become more weed than grass. It needed a makeover, but being North facing and shaded by a tall beech hedge, the options were limited.

Curbside project before makeover
Before …

Spring colour

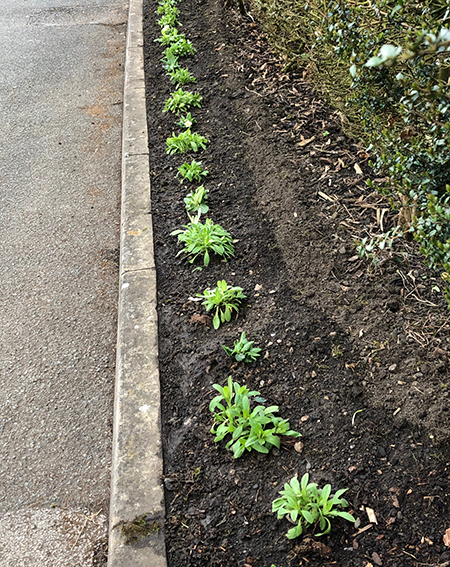
I decided to dig out the remaining patches of grass, and was pleasantly surprised by the quality of soil, although I extracted quite a few large stones and pieces of brick (now in a bucket in the shed, as they’ll be good drainage material at the bottom of pots).

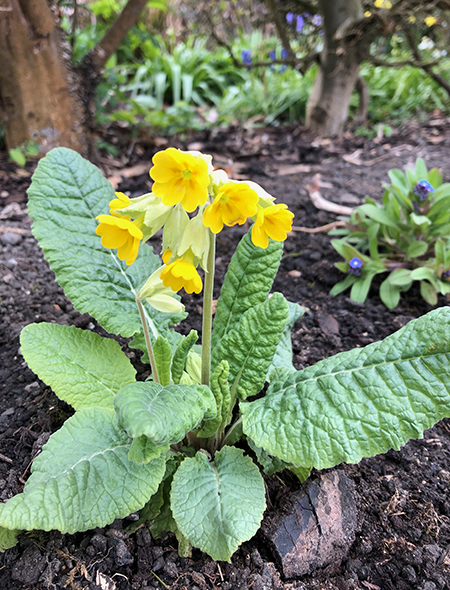
I added some home-made compost to improve the structure of the soil, planted it with primroses, cowslips and some fill-in forget-me-nots (which were in plentiful supply from the back garden) and watered. I’ll need to keep watering, as it will get quite dry under that hedge.

Curbside planting
… after

I plan to lift and divide the primroses and cowslips in the coming years to populate the bed with more springtime plants. They should be a welcome early source of nectar for pollinators. I will add some spring bulbs in the autumn.

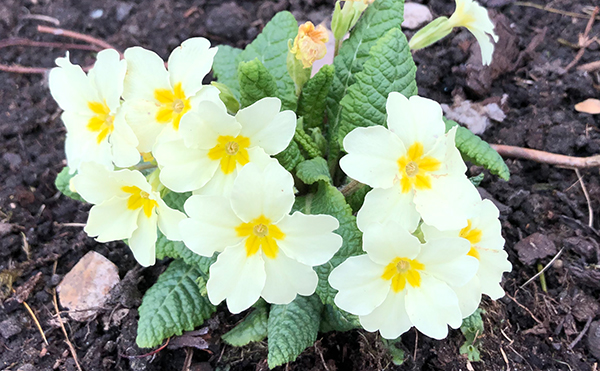
Primrose spring colour
Cowslip spring colour
The primroses and cowslips are already providing some spring colour

Summer colour needed

Any suggestions for summer colour would be very welcome, bearing in mind that the bed is North facing and shaded for much of the day (although it does get the sun in the mornings).

The plants need to be relatively low growing, good for pollinators (the number 1 rule for any new plants that I introduce to the garden) and slug resistant. I’m thinking perennial geraniums might work well.

Watch this space!

Ready, steady sow!

I’ve finally got going with my March indoor sowings, starting as always with three varieties of tomato – Moneymaker, Red Cherry and Maskotka.

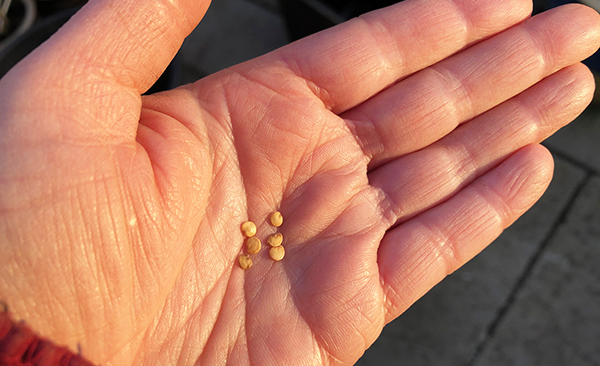
The seeds were big enough to handle individually, so this year I started them in small individual pots, in an attempt to reduce the amount of pricking out I need to do (my least favourite of all gardening jobs).

Tomato seeds
Tomato seeds are big enough to handle individually

Germination is always more successful than I expect and I find it hard to discard healthy seedlings, so I usually end up with far too many plants. Last year, I struggled to give them all away (I think everyone was growing their own tomatoes last year!). So, this year I have planted two seeds per pot and reduced the number of seeds I’ve sown.

Two seeds per pot
Two seeds per pot

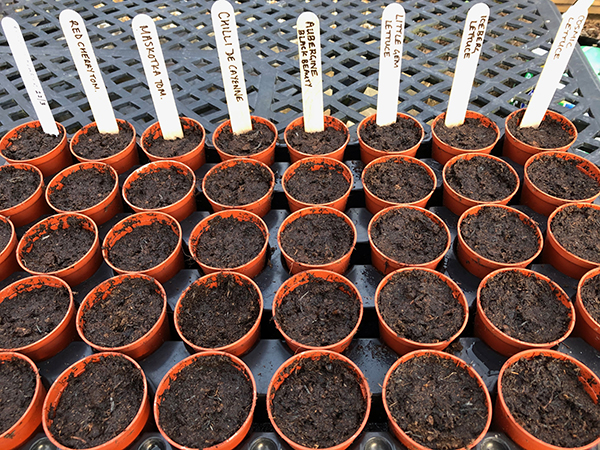
Aubergines (Black Beauty), chillis and several varieties of lettuce (Cosmic, Little Gem and Iceberg) swiftly followed.

Indoor sowings
Indoor sowings of tomatoes, aubergines, chillis and lettuce

It’s too cold to start any outdoor sowings (of things I like to eat), so our old decorating table will soon be straining under the weight of pots, and my kitchen will become a makeshift greenhouse for the next few months.

I’m always amazed that those tiny seeds can produce such amazing results.

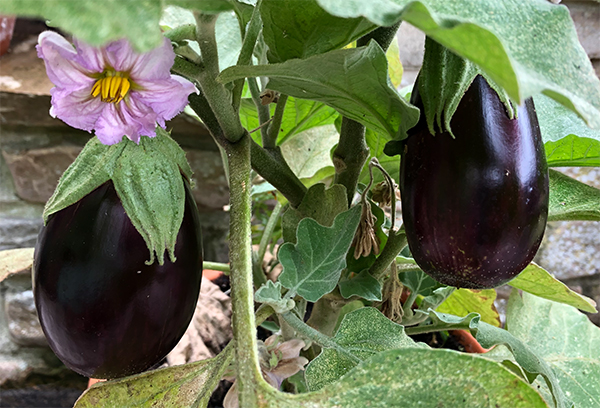
Growing aubergines
Last year’s aubergines

Next on the list are courgettes and leeks, plus Marigolds, Busy Lizzies and Black-eyed Susan. What are you sowing?

Time for a spring clean

It’s that time of year when everything starts to change. We’ve certainly seen a bit of everything from the weather, including glorious sunshine and blue skies, cold frosty mornings and, currently, a double-barrelled storm of torrential rain and fierce winds. It’s a wonder our plants have any idea what to do, but our gardens march on regardless.

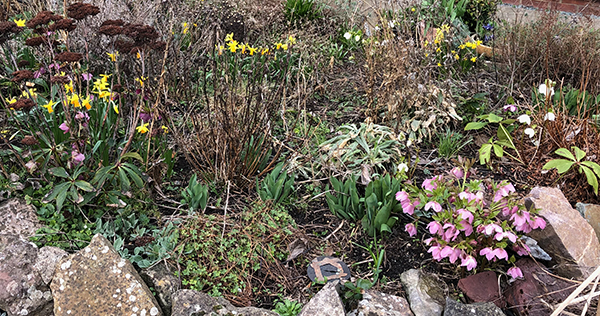
Mine started timidly flicking colour onto the canvas last week, unorganized bursts of random energy in an otherwise Jackson Pollock-esque tangle of winter debris.

Messy spring garden
Splashes of colour hidden among winter debris

Time for a tidy up

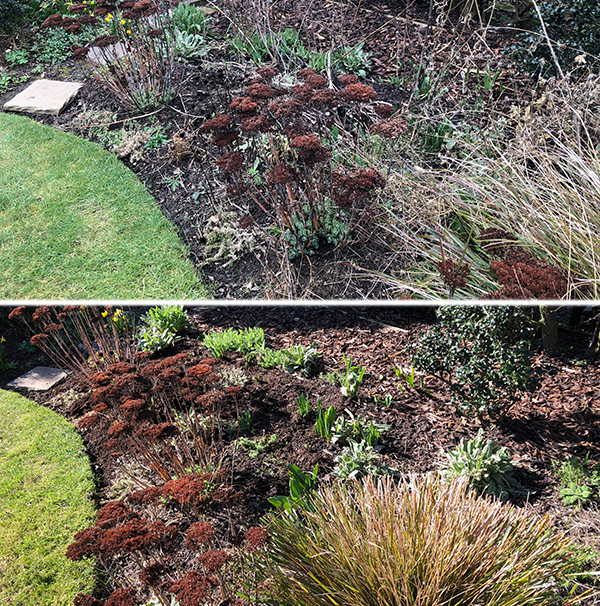
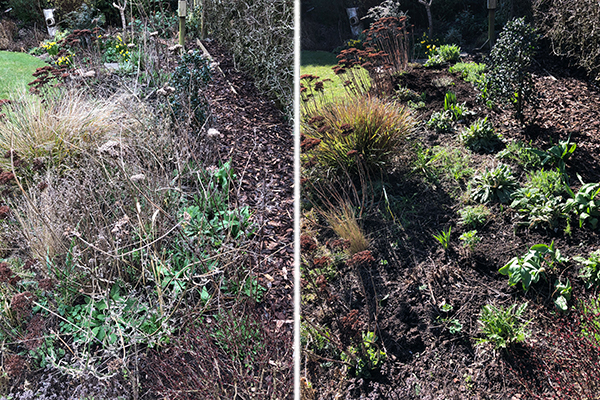
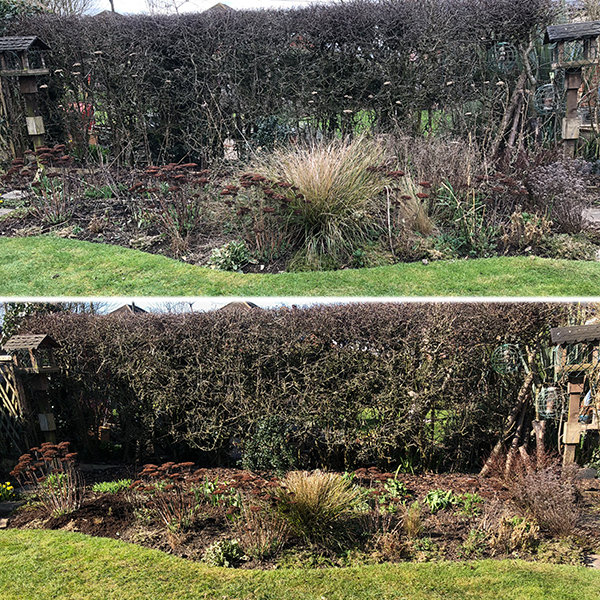
It spurred me into some much-needed spring cleaning, and over the past week I have gradually chopped and weeded away most of the vestiges of winter. After all, what is the point of planting spring bulbs if you fail to show off their cheery loveliness when they emerge.

Spring cleaned border
The same border after a thorough spring clean

Armed with a trowel and a pair of secateurs, I have worked my way around the main borders. Weeds in one bucket, anything shreddable in another.

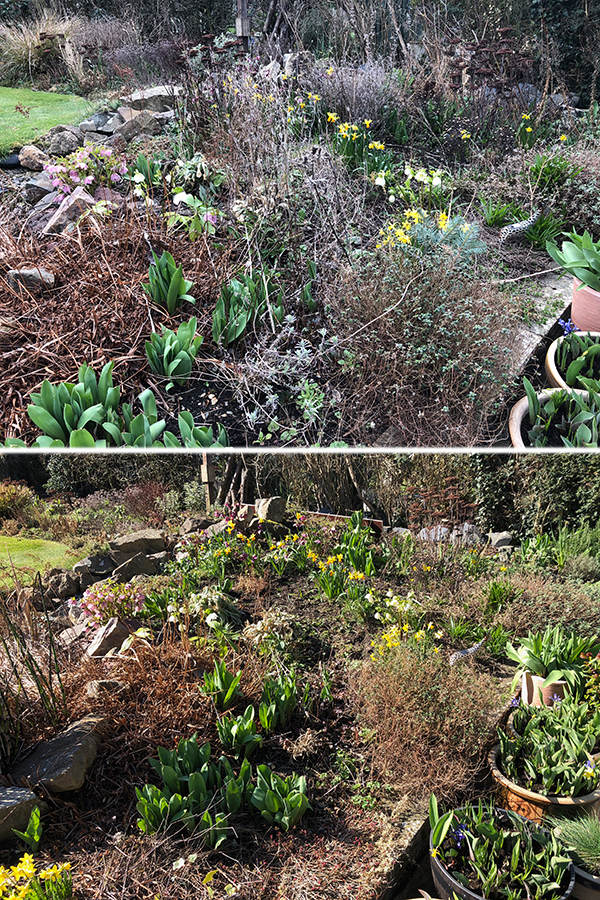
Before and after

It has made such a difference – to the garden and my mood – as I now feel (despite the return of some gloomy weather) that Spring has finally arrived on my patch. Here are my before and afters.

Before and after garden border - weeding and chopping 01
Before and after garden border - weeding and chopping 02
Before and after garden border - weeding and chopping 03
Before and after garden border - weeding and chopping 04

When it comes to spring cleaning the house or the garden, I know where I’d rather be! There is nothing more satisfying. Happy spring gardening everyone.

Mega mulching

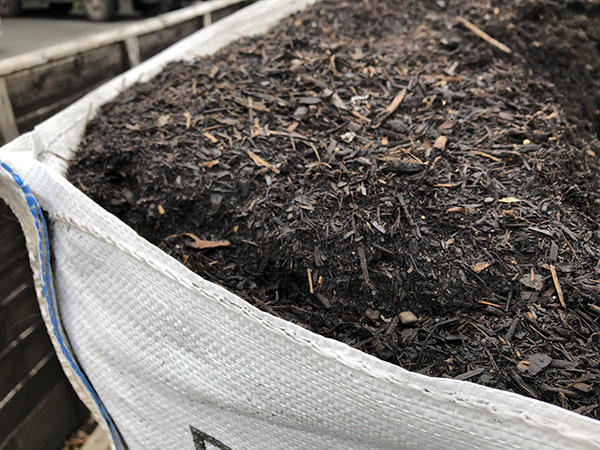
When the 900-litre bag of compost that I ordered online was first unloaded, I thought I might have miscalculated. How on earth (no pun intended), was I going to get through all of that?!

900-litre bag of mulch

3 good reasons to mulch

Mulching (what a wonderful word!) is the best thing you can do for your garden.

  1. Mulching reduces weeds (less weeding).
  2. Mulching retains moisture (less watering).
  3. Mulching improves the structure of your soil (healthier plants).

‘Black gold’

I have heavy clay soil, so I try to add as much organic material as I can throughout the year from my two compost bins, along with various shredded materials. But this year, with a bit more time on my hands than usual thanks to Lockdown, I decided to give my garden a treat and mulch on a much grander scale.

And so I found myself ordering a whole lot of compost mix called ‘black gold’, a blend of peat-free soil improver and well-rotted farmyard dung and animal bedding.

Premium mulch
‘Black gold’: a premium blend of soil improver and well-rotted manure

Wheelbarrows of mulch

Shifting all that compost was a bit of a daunting task, but I was soon pushing wheelbarrows heaped with organic goodness across my lawn and shovelling heaps of it onto my borders.

A wheelbarrow full of mulch

Mulching depth

The thickness of your mulch matters! It is better to pile 2–4 inches of mulch on a small area of soil around your plants than spread it thinly across a larger area. A thick mulch will prevent annual weeds from growing by cutting out the light.

Ideally, you should do all your weeding and plant dividing before you mulch, as the less it is disturbed the better. I’d managed the weeding part, but I fully expect to be dividing and moving various plants over the coming weeks, so it will have to put up with a bit of disturbance.

Mulch your borders
Add 2–4 inches of mulch to your borders and try to leave it undisturbed to fully reap the benefits

The end result

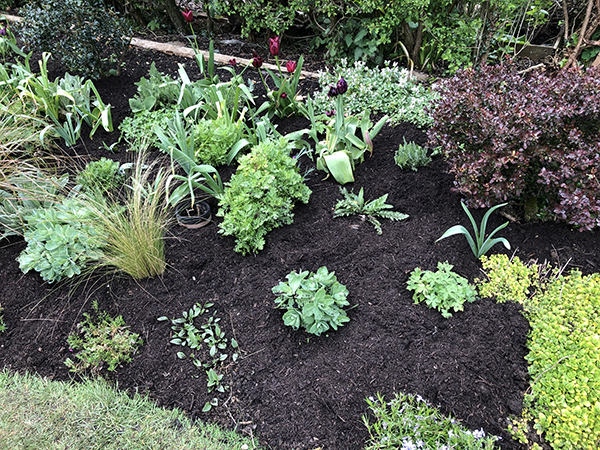
Within 2 days I had emptied the bag, spreading all that organic loveliness, across the borders and raised beds in my front and back gardens. In fact, I still had two borders to do when I ran out, so they will be treated to my homemade compost instead.

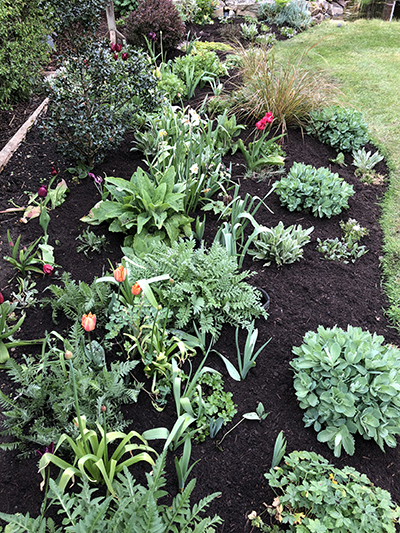
The borders are looking so much better for it, and I know the plants will benefit.

Border weeded and mulched
Border weeded and mulched – tick!

It turned out to be a pretty good workout too. Bonus!

Six on Saturday: Tulip mania

This week has been all about the tulips.

1. First tulip

It all started with this very first perfectly formed specimen flushed with a delicate pink.

First tulip 2020

2. Radiant blooms

As more tulips started to open, and the sun shone, the garden basked in the radiance of their blooms.

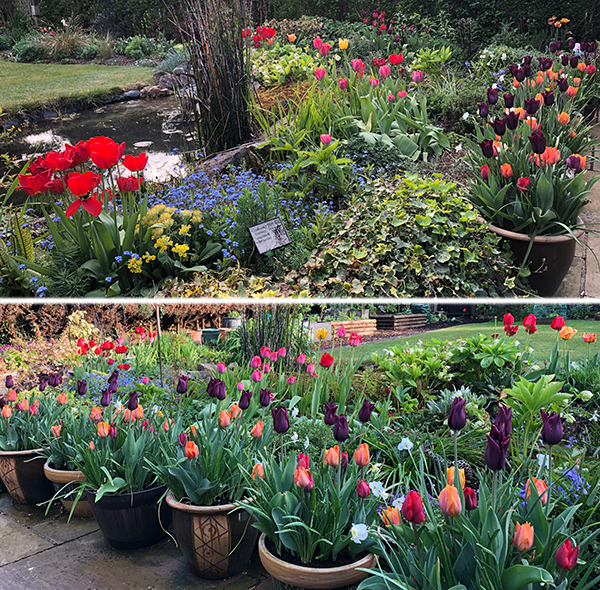
Radiant tulips

3. Fabulous colour combos

Some of the colour combinations have been simply divine. Here, the deep burgundy satin blooms of Havran stood tall over the red-crimson petals of Couleur Cardinal and the sunset colours of Prinses Irene.

Tulip colour combinations

4. Inner beauty

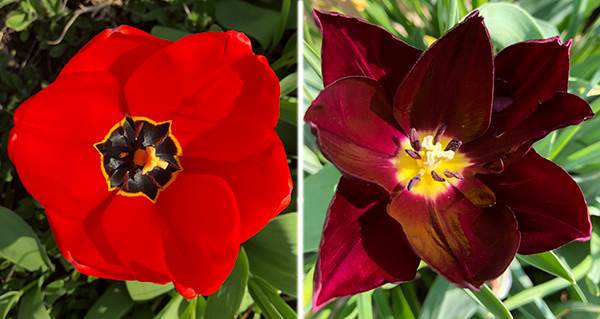
On closer inspection, as the tulips unfolded, the insides revealed a further hereto hidden inner beauty.

Hidden beauty inside tulips

5. My favourite tulip

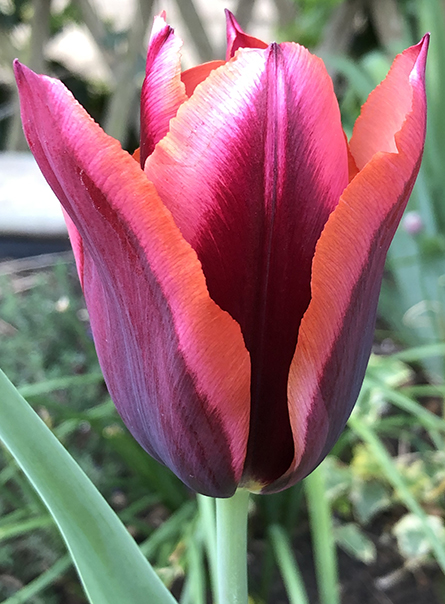
It was hard to choose, but Slawa came out the winner this year for sheer wow factor. A deep rich burgundy edged with apricot, all in one perfect goblet-shaped bloom.

My favourite tulip, Slawa

6. Tulip tableau

The stage was set, and all that planting earlier in the year did not disappoint. The tulips have been an absolute joy, particularly at a time when I have needed cheering up. And I wanted to share it with you …

Tulip tableau

Deadheading daffodils

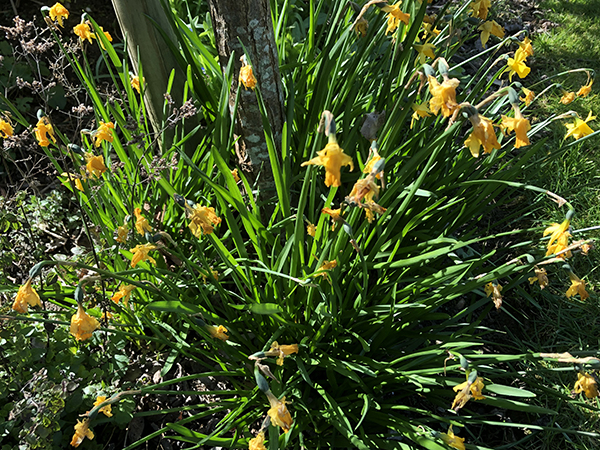
As your host of golden daffodils makes way for a throng of radiant tulips, there is one easy job that you can do right now – grab your garden scissors or secateurs and snip the scruffy fading heads off your daffodils, or pinch them off with your fingers.

Scruffy end-of-bloom daffodils
Daffodils start to look at bit scruffy as the blooms fade and shrivel

Remove the faded blooms just below the swelling at the back of the flower. This stops the plant from expending energy making a seed pod.

Remove spent daffodil blooms
Cut off spent daffodil blooms where shown (arrow)
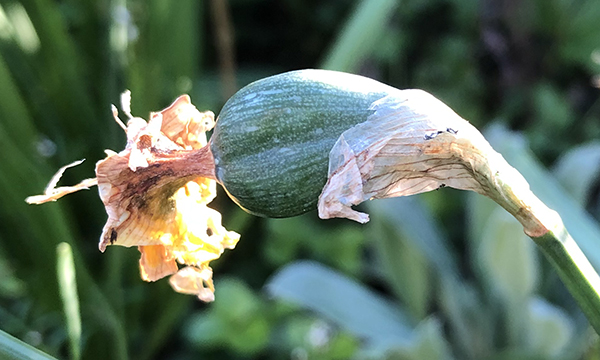
Daffodil seed pod
If you don’t remove the heads the plant will waste energy creating seeds

There’s no need to remove the rest of the foliage; let it die back naturally over the next 4–6 weeks. In theory, the plant will put all the goodness back into the bulb instead, so that it will produce more gorgeous flowers next year.

I say ‘in theory’, as there is some debate as to whether deadheading daffodils makes any difference at all to the following year’s flowering. Even if it doesn’t, it will make your garden look a little bit tidier, and you can add the spent flower heads to the compost.

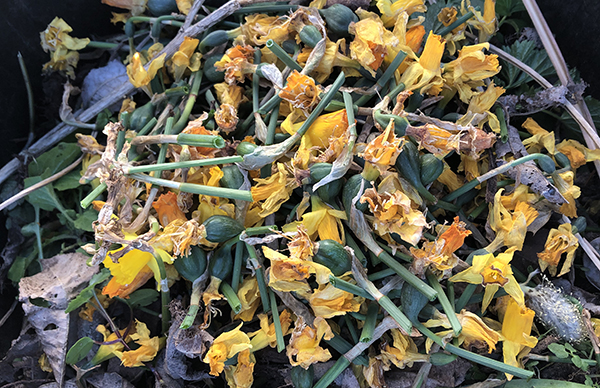
Add deadheaded daffodils to the compost
Add deadheaded daffodils to the compost, so nothing goes to waste

When the foliage has turned completely limp and yellow, you can cut it back to ground level.

Deadheading daffodils is an easy 15-minute job – the perfect opportunity to get up from your work-from-home desk or escape the rest of the family for a walk around the garden and a little quiet ‘me’ time.

Happy snipping!

Five Firsts

It’s the 1st of April – how did that happen?! While there has been plenty to do in the garden throughout March, things truly start to “ramp up” in my garden now. April is the month when I go into sowing and planting overdrive.
To celebrate the first day of this glorious month, here are five firsts, fresh from my garden.

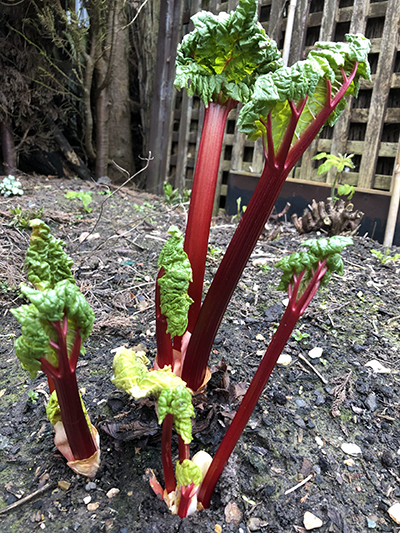
First rhubarb

First rhubarb
An early harvest of forced rhubarb, covered with a bucket to exclude light to produce rosy sweet stems.

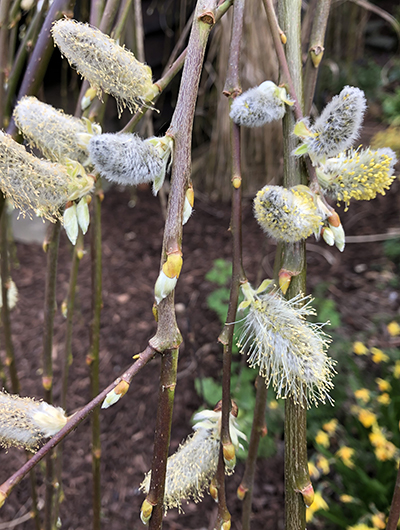
First catkins

First willow catckins
The first of the willow (Salix) catkins have burst forth. The catkins appear before the leaves, bearing their all for pollination.

First cherry leaf burst

Cherry tree bud burst
The stumpy swollen buds of the cherry tree have started to burst with the first red-tinged leaves.

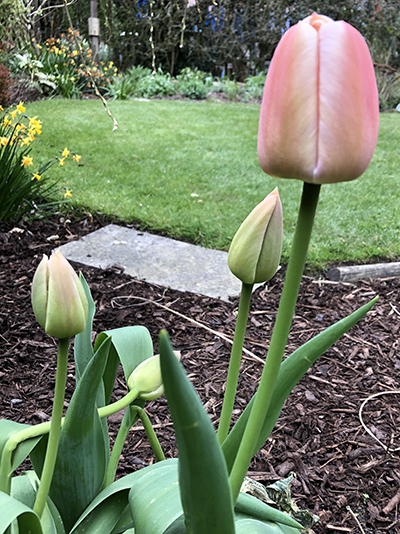
First tulip

First tulip
The first tulip has emerged, with the promise of many more to come.

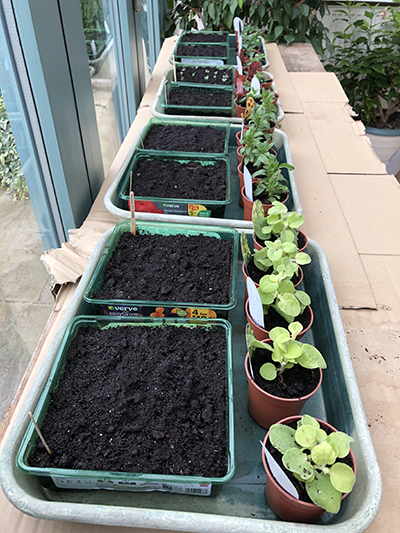
First sowings

First sowings
The first of many sowings: tomatoes, aubergines, chillis, Brussels sprouts and sweet peas.

Here’s to rising temperatures, and a glorious month of sowing and planting!