Potatoes: a whole new language

A lot of gardeners have Easter marked as the time to start planting their potatoes. I guess it’s the prospect of a long weekend in the garden or on the allotment that turns our thoughts to planting spuds.

But before you start digging, do you know your ‘first earlies’ from your ‘maincrops’? Have you heard of ‘indeterminates’ and ‘determinates’? What are ‘seed potatoes’ and do you need to ‘chit’ them? Yes, the humble potato (Solanum tuberosum) comes with a language all of its own.

Freshly harvested potatoes

Seed potatoes

Seed potatoes are potatoes from last year’s harvest that you grow this year’s potatoes from. It’s fine to use a few tubers from your previous crop if they have stored well over winter and look healthy. However, using potatoes from your own crops year after year runs the risk of carrying over any disease that might be present. With that in mind, it is also important not to grow potatoes in the same soil each year, as pests and diseases are likely to build up.

In general, it’s best to use a fresh stock of seed potatoes from a garden centre or online catalogue. They will be virus free and guaranteed to give you a tasty, disease-free crop. There will also be plenty of varieties to choose from.

Potatoes chitting on a window sill
Seed potatoes guaranteed to be virus free

Although it is possible to grow potatoes from store-bought eating potatoes, you won’t get the same disease-free guarantee. If you decide to try this, make sure you buy organic as some eating potatoes are treated with a chemical that prevents sprouting.

First earlies, second earlies and maincrop potatoes

These terms simply relate to the time when you plant and harvest your potatoes. First and second earlies (new potatoes) are often planted at the same time, with second earlies being ready for harvesting a few weeks later than first earlies. Maincrop potatoes are generally planted a bit later, take longer to grow and are harvested later in the year.

When to plant potatoes

There is no hard and fast rule for when you should plant potatoes. It will depend on the temperatures in your region. Later planting (up to a couple of weeks before your last frosts) simply means later harvests, so don’t panic if you can’t start planting over the Easter weekend! As a very general guide…

First earlies can be planted around the end of March/early April for harvesting 10–12 weeks later in June/July. They are the earliest to crop, hence the name ‘first early’. Popular varieties of first early potatoes include:

  • Arran Pilot
  • Duke of York
  • Foremost
  • Orla
  • Pentland Javelin
  • Rocket
  • Sharpes Express
  • Swift

Second earlies can be planted in mid-April for harvests 14–16 weeks later from July onwards. Popular varieties of second early potatoes include:

  • Charlotte
  • Estima
  • Jazzy
  • Kestrel
  • Maris Peer
  • Ratte

Both first and second earlies tend to be small and flavoursome new potatoes, ideal for boiling and steaming. They are best eaten soon after harvest.

Main crop potatoes can be planted in mid- to late-April for harvesting after 15–20 weeks from late August onwards. Popular main crop varieties include:

  • Cara
  • Desiree
  • King Edward
  • Maris Piper
  • Navan
  • Pink Fir Apple

Maincrop potatoes tend to be bigger than first and second earlies and can be baked, roasted or fried. They also store well over winter.

Chitting

Chitting is the process of forcing seed potatoes to start sprouting a few weeks before they are planted out (see How to chit potatoes). Left in a cool dry place in the light, the ‘eyes’ of seed potatoes produce stubby sprouts called ‘stolons’. When planted below ground, the stolons grow upwards to create the new potato plant.

Chitted potatoes, ready to plant
Chitted and ready to plant

Chitting is a good way of getting early varieties off to a head start so that they get growing quickly when they are planted, but it isn’t essential.

Indeterminate versus determinate potatoes

I only discovered these terms a few weeks ago and they will completely change the way I grow my potatoes this year, as indeterminate and determinate potatoes have different growth habits.

Indeterminate potatoes produce their crop at intervals along the growing stem in multiple layers. As the plant grows up you need to keep covering the stem (‘earthing up’) so that the layers of potatoes remain underground. You need vertical space for this type of potato and they take longer to grow than determinate varieties. Most (but not all) maincrop potatoes are indeterminate.

Determinate potatoes grow in a single layer just below the seed potato in the top layer of soil. They will benefit from a layer of mulch as they grow to ensure any tubers that break through the surface are protected from the light. The plants do not grow very tall and flower earlier than indeterminate varieties. Most (but not all) early varieties are determinate.

Growing potatoes in containers

With limited veg-growing space, I’ve always grown my potatoes in sacks. For years I’ve been planting 2 or 3 potatoes deep in each sack and ‘earthing up’ around the stems as they grow, thinking that they are growing layers of potatoes. But it turns out that most of the varieties I’ve been growing are ‘determinate’ and have therefore been growing in a single layer. So, this year, I will still plant them in sacks, but I will plant 2 seed potatoes in the bottom third of the sack, then another 2 in the next third. In theory, I should get double the harvest in the same space. Result!

Potato sacks in leaf
Sacks of potatoes

Whatever type or variety of potato you decide to grow, and whether you chit or not, there is nothing more satisfying than harvesting flavoursome home-grown potatoes.

Homegrown Charlotte potatoes

So let me know what you’re growing this year and any potato-growing tips you want to share.

How to choose the right Mahonia

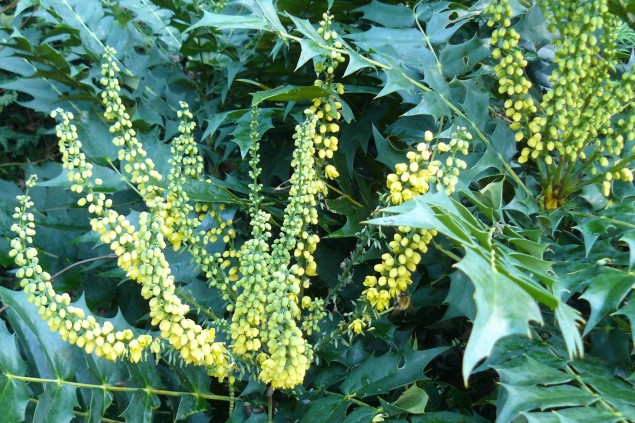
Mahonias are fantastic evergreen plants, with clusters or spikes (racemes) of scented yellow flowers that are rich in nectar and a magnet for foraging bees in winter. The different species of Mahonia come in a range of sizes to suit any garden type, and flower at different times from late autumn to early spring.

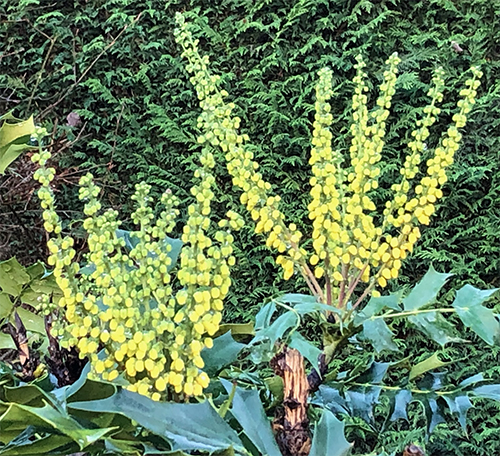
Mahonia in bud: a rich supply of nectar through the winter months
Mahonia in flower: a rich supply of nectar in December in my garden

Mahonia or Berberis?

Mahonias are members of the Barberry family (Berberidacae). However, botanists haven’t completely agreed on the nomenclature. Don’t be confused (as I was) if you see the same plant with two different names: Berberis and Mahonia. Mahonia aquifolium is also sometimes known by its common name of Oregon grape (Oregon adopted it as its official state flower in 1899) .

Best features of Mahonia

Mahonias tend to be planted for their bold architectural foliage. Most Mahonias are large shrubs with rows of glossy, deep green, spine-toothed leaves. However, there is a variety called Mahonia eurybracteata ‘Soft Caress’ that has spine-free foliage if you are looking for something softer.

The biggest delight is the characteristic clusters of scented yellow flowers. These are followed by pretty purply-blue berries.

Mahonias tolerate all types of well-drained soil, and will thrive in sun or shade. This makes them a good choice for ‘problem’ areas of the garden. Most are fully hardy, down to –15oC.

Mahonia berries

Key factors when choosing a Mahonia

To find the right Mahonia for your garden it is worth considering both size and flowering time. Although there are about 70 species of Mahonia, a few key varieties tend to be sold by garden centres or online retailers in the UK.

Mahonia x media ‘Winter Sun’, ‘Charity’ and ‘Lionel Fortescue’ can grow to 2.5–4 metres in height, although they can taken 10–20 years to reach their ultimate size. Being large upright shrubs, these varieties are ideal as a focal point at the back of a border. Sometimes they are used as hedging. They tend to flower between late November and early January.

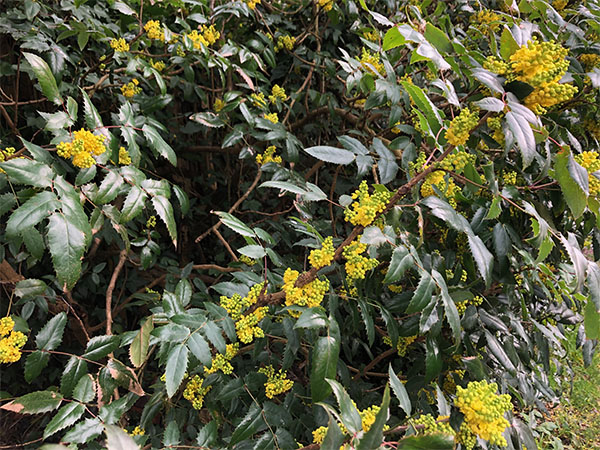
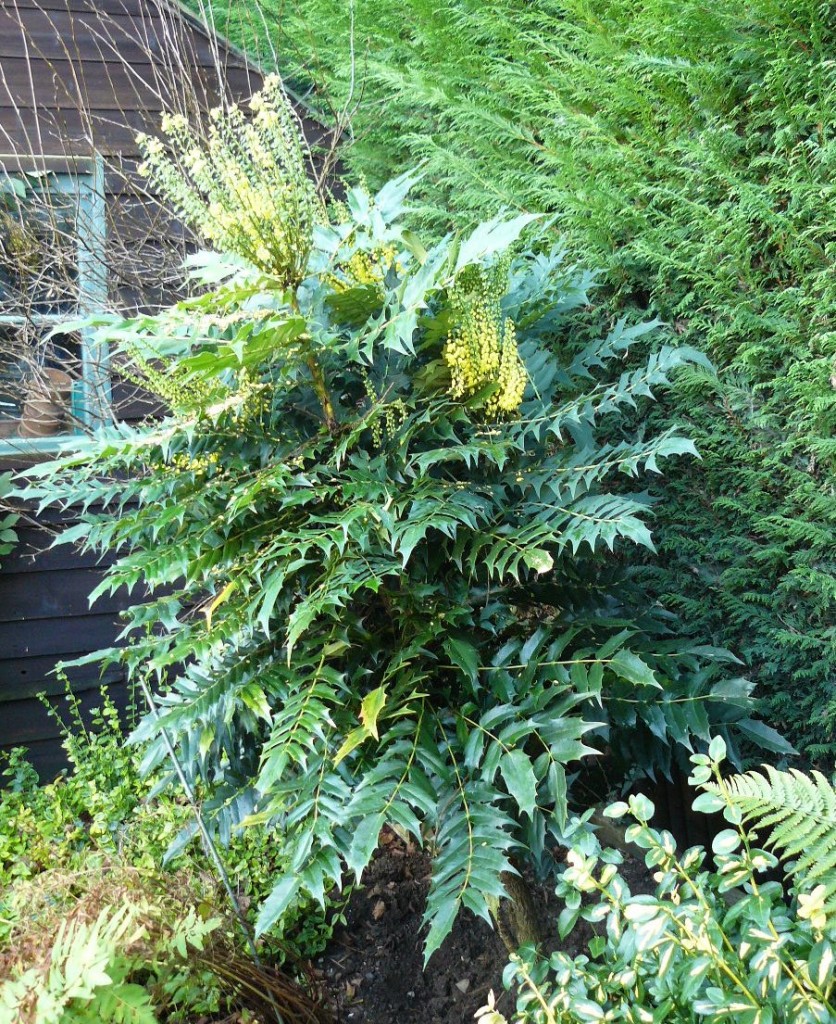
Mahonia japonica is smaller than the ‘Media’ varieties, but is another erect shrub that can grow to 1.5–2 metres in height. It also flowers between the end of November and March.

Mahonia japonica in a border of mixed shrubs at the bottom of my garden

Mahonia aquifolium ‘Apollo’ is a more compact variety that grows in a low spreading dome. It reaches about 1 metre in height and spreads to about 1.5 metres.

Mahonia aquifolium 'Apollo' shrub
Mahonia aquifolium ‘Apollo’

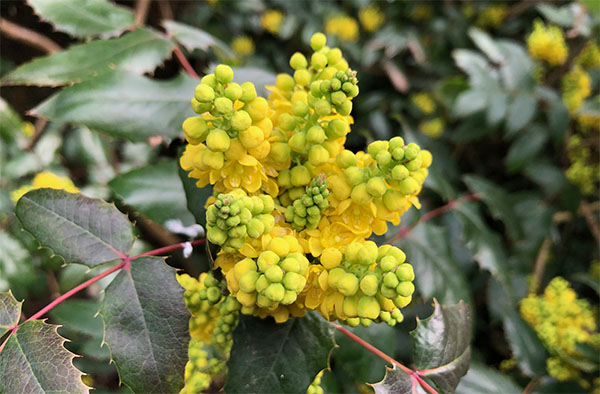
I pass this one on my daily dog walk. It has been bursting with compact clusters of intensely scented flowers all through February. It is thriving in a sheltered walkway next to a fence where it gets both sun and shade.

Highly scented flowers of Mahonia aquifolium 'Apollo'
Intensely scented flowers of Mahonia aquifolium ‘Apollo’

Mahonia repens has a low, creeping habit, with a height of 30–50cm and spread of 1 metre. It is ideal for shady ground cover, at the front of a border, or to cover a bank. This variety flowers in mid to late Spring (April/May).

Planting Mahonia

March is a good time to plant Mahonias. Make sure you choose a spot where your variety of choice has enough room to grow. I initially planted my Mahonia japonica too close to a conifer hedge and had to move it (see Mahonia on the Move). Dig a hole that is twice the size of the root ball. Plant the Mahonia with some well-rotted compost and firm it in well before giving it a good soak.

Mahonia care

Mahonias are low maintenance plants. They have low nutrient requirements, but like most shrubs will appreciate a mulch in early spring and/or autumn. This will also help to suppress weeds around the base. They can tolerate relatively dry conditions, so they only need watering in times of drought.

Pruning. Thankfully, pruning can be kept to a minimum, not least because the holly-like leaves can make it an uncomfortable process. In fact, you don’t need to prune a Mahonia at all unless your shrub loses its shape or gets too leggy.

If you do need to prune, make sure you are wearing a sturdy pair of gardening gloves. After flowering, remove any dead or diseased branches, or any branches that are growing out at an awkward angle or crossing with other branches.

If your Mahonia has become bare at the base, you can give it a hard prune by cutting a third of the branches down to about 15 cm (6 inches) from ground level. It will look a bit sorry for itself for a while, but this will help to generate fresh growth from the base.

To make plants bushier, cut back branches by 30–50%, which will stimulate the production of side shoots.

Avoiding disease. In general, Mahonias remain pest and disease free. Powdery mildew and rust are potential problems though. To help avoid these, make sure you water at the base of the plant and not on the leaves, regularly remove dead leaves and material from around the plant, and prune out a few central branches to let air circulate through the plant. Remove any affected leaves as soon as the problem appears so that it does not spread to the rest of the plant.

Go get a Mahonia

In summary, a Mahonia will add winter colour and nectar to your garden, will grow pretty much anywhere, and will be relatively low maintenance. So, if you have the room, I highly recommend you go out and get a Mahonia.

February in the garden: prepare, plant and prune

February can be a frustrating month. I’m itching to clear away the winter debris but even here, in the South of England, heavy frosts and downpours (and even snow) are likely to prevent a major tidy-up for another month. My borders need their protective winter duvet of last year’s growth for just a little bit longer.

The Beast from the East in 2018 was a reminder to expect the unexpected in February

Yet, as the earliest signs of Spring begin to emerge, there are lots of things I can do to prepare my happy place for the gardening year ahead. Having been out of action for a little while, I’m excited. Here we go again!

Plan and prep

I love planning what flowers I want to surround myself with, what veg I want to eat and where it’s all going to grow.

It’s hard to imagine this…

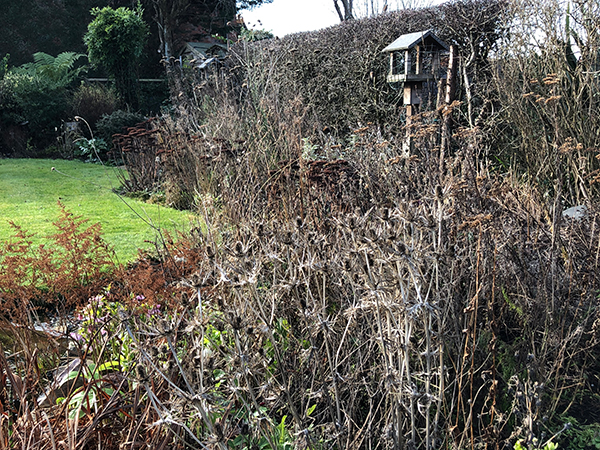
Pretidy winter garden
February 2022

Becoming this…

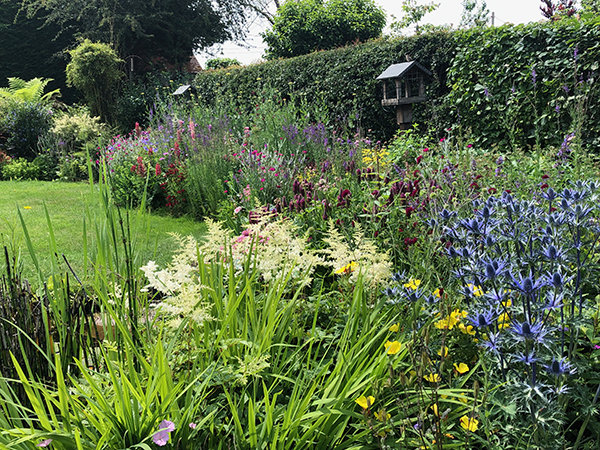
June flower border 2021
June 2021

But last year it did!

The garden may not end up looking anything like the vision in my head right now, but it’s a lot of fun imagining what it could look like.

Get organized

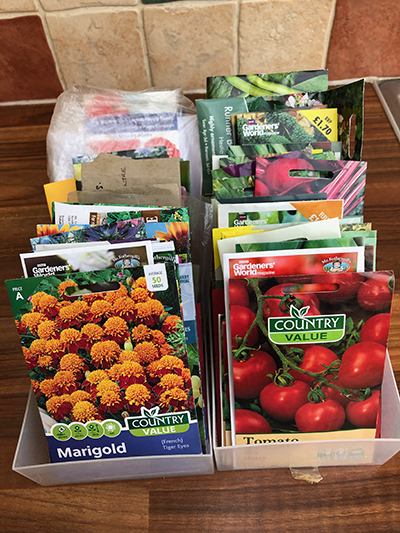
On a more pragmatic note, it’s also worth being prepared for the frenzy of sowing and growing that is but a few weeks away. If you haven’t done so already, now is the time to check your seed packets and order in what you haven’t got, tidy your shed and wash your pots.

Organized seed packets
Check what seeds you’ve already got

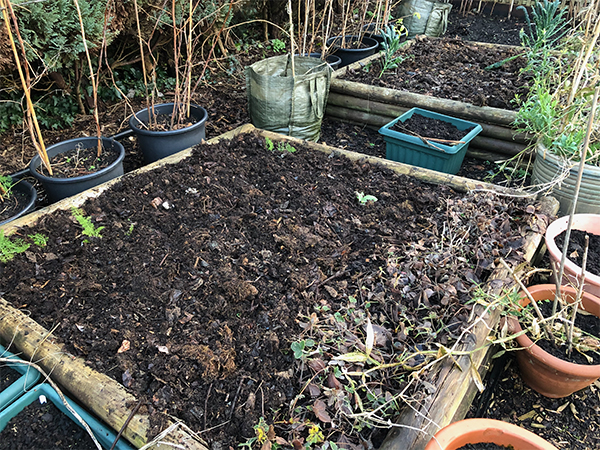
You can also prepare your veg beds now by removing weeds and applying an organic mulch.

Vegetable bed mulched with garden compost
A well-mulched vegetable bed

Pruning

Many plants need to be pruned in winter when they are dormant. In my garden, this applies to the few roses that I have in pots and my apple and pear trees, and this year I’m going to have a go at some (hopefully) restorative winter pruning of honeysuckles that have become very woody.

Apple-tree-pruning
Prune apple trees in winter while they are dormant

Early sowings

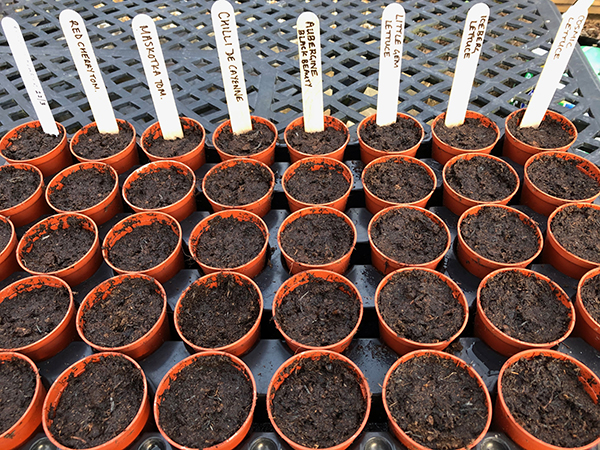
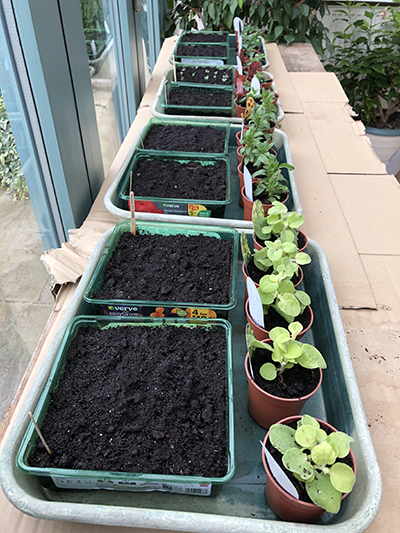
February is also a good month to start sowing indoors. I’ll be getting tomatoes and aubergines started from seed this month, as well as the first of some successional sowings of lettuce, as I want to stop buying so much of it from the supermarket (it always comes wrapped in plastic!).

Indoor sowings
Last year’s indoor sowings of tomatoes, aubergines, chillis and lettuce

Bare-root planting

Winter is also the best time to plant bare-root trees and shrubs, so that they can get established before expending the energy they’ll need to produce leaves and flowers. Roses, fruit bushes and canes, hedging and dogwoods (Cornus) can all be started as bare-root plants. Last year I planted two bare-root climbing roses, which are now well established.

February checklist

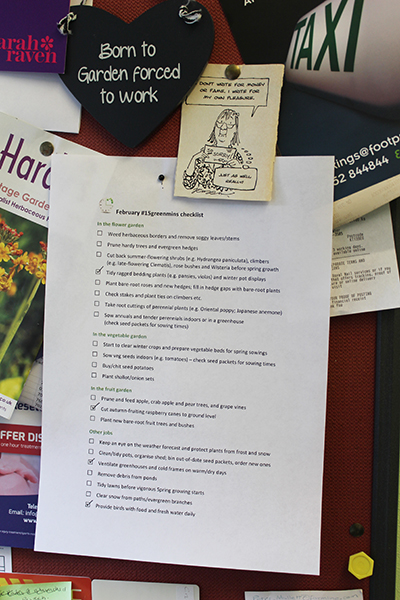
It may all sound a bit daunting, but if you break it down into 15-minute tasks you’ll be surprised how much you can get done. I get a great sense of achievement from ticking things off a list, so I make a monthly checklist to help me stay on track. Take a look at my February checklist of gardening jobs, which can all be achieved 15 minutes at a time.

February-#15greenmins-checklist
February #15greenmins checklist: you can do anything for 15 minutes, including gardening!

North-facing curbside makeover

While I enjoy taking 15-minute breaks from my desk during the week, the weekends are an opportunity to tackle larger projects.

My front garden is a small plot, roughly 9 x 7 metres, next to the driveway. It comprises a squarish lawn, with borders that are mostly planted with shrubs and conifers, and is enclosed by two beech hedges. I confess, the back garden gets a lot more attention, so I’ve decided to give the front a bit more TLC this year, starting with the curbside view.

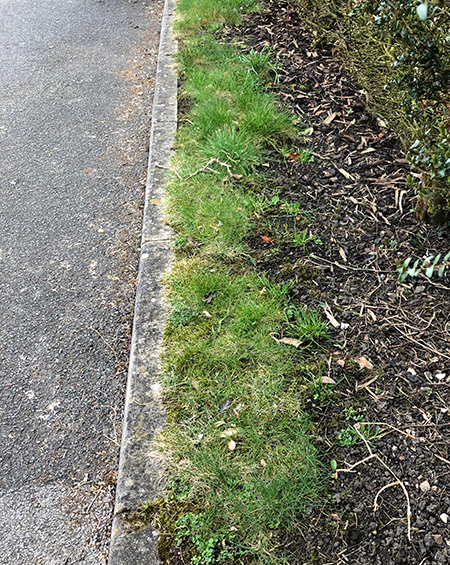
There used to be a 1-foot strip of grass in between the front beech hedge and roadside curb, but over the years it has become more weed than grass. It needed a makeover, but being North facing and shaded by a tall beech hedge, the options were limited.

Curbside project before makeover
Before …

Spring colour

I decided to dig out the remaining patches of grass, and was pleasantly surprised by the quality of soil, although I extracted quite a few large stones and pieces of brick (now in a bucket in the shed, as they’ll be good drainage material at the bottom of pots).

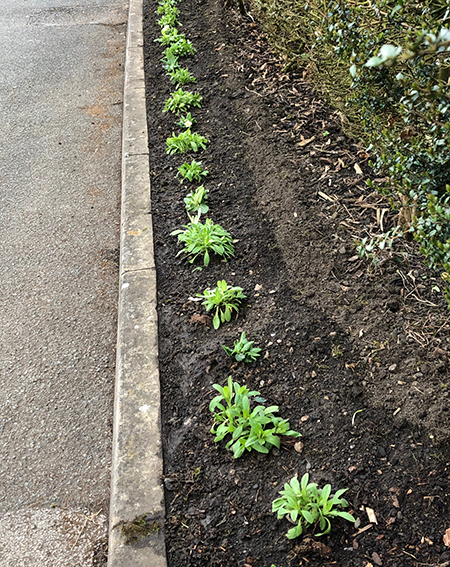
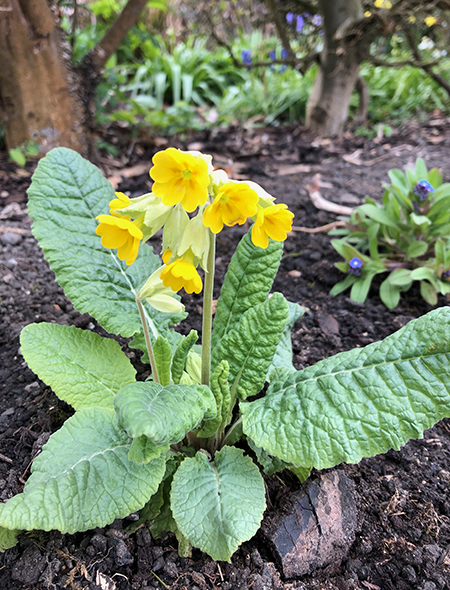
I added some home-made compost to improve the structure of the soil, planted it with primroses, cowslips and some fill-in forget-me-nots (which were in plentiful supply from the back garden) and watered. I’ll need to keep watering, as it will get quite dry under that hedge.

Curbside planting
… after

I plan to lift and divide the primroses and cowslips in the coming years to populate the bed with more springtime plants. They should be a welcome early source of nectar for pollinators. I will add some spring bulbs in the autumn.

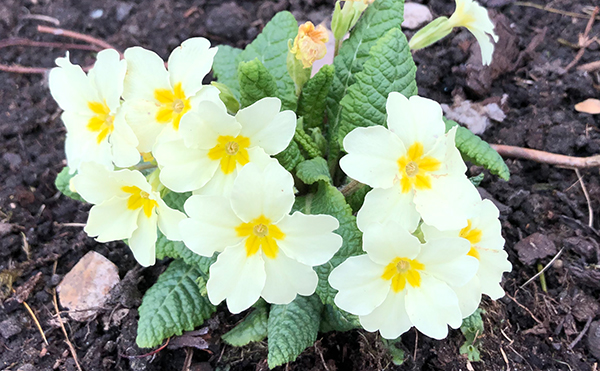
Primrose spring colour
Cowslip spring colour
The primroses and cowslips are already providing some spring colour

Summer colour needed

Any suggestions for summer colour would be very welcome, bearing in mind that the bed is North facing and shaded for much of the day (although it does get the sun in the mornings).

The plants need to be relatively low growing, good for pollinators (the number 1 rule for any new plants that I introduce to the garden) and slug resistant. I’m thinking perennial geraniums might work well.

Watch this space!

Five Firsts

It’s the 1st of April – how did that happen?! While there has been plenty to do in the garden throughout March, things truly start to “ramp up” in my garden now. April is the month when I go into sowing and planting overdrive.

To celebrate the first day of this glorious month, here are five firsts, fresh from my garden.

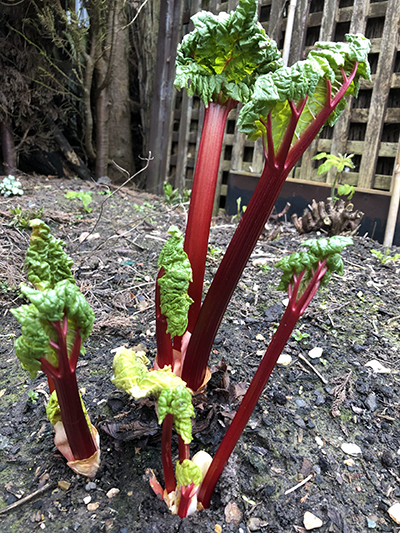
First rhubarb

First rhubarb
An early harvest of forced rhubarb, covered with a bucket to exclude light to produce rosy sweet stems.

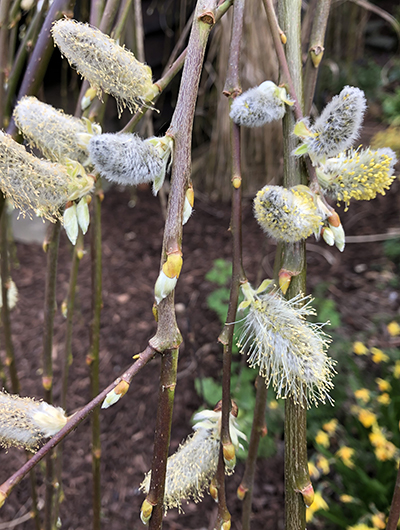
First catkins

First willow catckins
The first of the willow (Salix) catkins have burst forth. The catkins appear before the leaves, bearing their all for pollination.

First cherry leaf burst

Cherry tree bud burst
The stumpy swollen buds of the cherry tree have started to burst with the first red-tinged leaves.

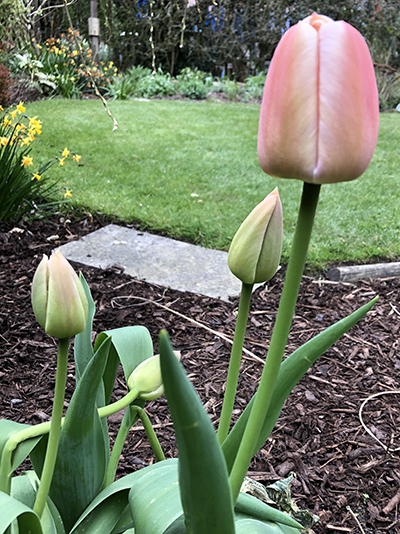
First tulip

First tulip
The first tulip has emerged, with the promise of many more to come.

First sowings

First sowings
The first of many sowings: tomatoes, aubergines, chillis, Brussels sprouts and sweet peas.

Here’s to rising temperatures, and a glorious month of sowing and planting!

Mahonia on the move

mahonia-flowers
Yellow flowers of Mahonia japonica provide winter colour and pollen

This weekend we moved our Mahonia japonica. Established trees and shrubs should only be moved if absolutely necessary, as there will undoubtedly be some degree of stress when the plant is uprooted.

Unfortunately, this beautiful specimen (currently in full bloom and providing some much-needed late pollen for the bees) had started to grow out at an angle away from the large conifer hedge behind it. So, although it’s been flourishing in this dry shady spot, the time had come to move it.

Tips for minimising trauma when moving large plants

  • Water the soil well the day before moving
  • Prune lightly if possible
  • Lift the plant with as much rootball intact as possible
  • Prepare the new hole in advance and lift and replant in one operation
  • Mix some fresh compost in with the existing earth
  • On transplanting, firm around the base of the plant carefully
  • Water thoroughly after planting
  • Keep watering if the weather is dry until the plant is re-established

A prickly job

It wasn’t a job we were particularly looking forward to (I say ‘we’, as I enlisted the brute strength of my husband on this occasion), as the Mahonia’s spine-toothed leathery leaves don’t make it an easy specimen to get to grips with.

All I can say is … ouch! But in 15 minutes the deed was done (we’d pre-dug the hole), and my Mahonia now has the room to grow tall and straight.

Mahonia japonica
Before the move: the Mahonia was growing at a jaunty angle, but had nowhere to go
straight-mahonia
After the move: now the Mahonia has room to flourish

Choosing the right Mahonia

Different types of Mahonia grow to different heights and flower at different times of year. There are even ‘soft’ varieties available if you are worried about the prickles. To find the right Mahonia for your garden, see How to choose the right Mahonia.