English vs Spanish bluebells

If you have been walking in the woods over the past few weeks, chances are you have come across a quintessentially British sight: deep violet-blue carpets of English (or common) bluebells. Blooming in April and May, they are the last of the Spring flowers to emerge from the woodland floor before the leaf canopy thickens overhead and blocks out the sunlight.

Although native to Western Europe, half of the world’s common bluebells can be found in the UK, where they are a protected species. Most grow in, and on the edges of, ancient broadleaf woodlands, but they also grow in hedgerows and grassland and even on coastal clifftops.

Bluebells on the Cornish coast
Bluebells on the Cornish coast near Port Isaac

A Spanish rival

Unfortunately, the English bluebell (Hyacinthoides non-scripta) is under threat from the invasive Spanish bluebell (Hyacinthoides hispanica). The Victorians introduced the Spanish bluebell as a garden plant, but in the early 1900s it escaped beyond the garden fence. Let loose in the countryside, it has been found to outcompete and cross-pollinate with our native species to produce vigorous hybrids, particularly in urban areas.

How to tell the difference?

It is fairly easy to spot the difference between Spanish and English bluebells.

English vs Spanish bluebells, how to tell the difference
Spot the difference. (Left) English bluebell. (Right) Spanish bluebell.
EnglishSpanish
Flower colourDeep violet-blue (occasionally white)Pale blue; also pink and white
Flower shapeNarrow, tubular bells with tips that curl backOpen, conical bell, with open, spreading tips
StemsArching with flowers on one sideUpright with flowers on both sides
PollenCream-colouredBlue- or pale green-coloured
LeavesNarrow, ~1.5 cm wideBroad, ~3 cm wide
ScentSweet scentLittle or no scent
Cream-coloured pollen of English bluebell

Be plant wise

Although Spanish bluebells are very pretty and easy to grow, be aware that they are likely to outgrow their welcome in your garden. They multiply rapidly and are very deep-rooted, which makes them incredibly difficult to eradicate once established.

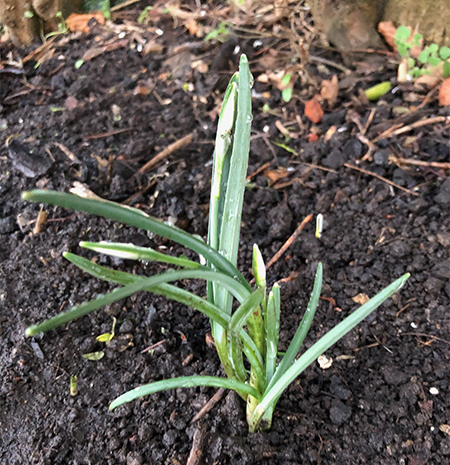
A few bulbs in my garden (which, to be honest, I don’t remember planting, so may have seeded in my garden from elsewhere) rapidly spread within 3–4 years throughout one of my herbaceous borders. They were lovely to look at and were a big hit with the bees, but they were complete thugs, forming dense clumps that started to smother smaller plants in the border.

So, I recently spent several hours trying to dig them all out. I found all sizes of bulbs at varying depths, and I definitely didn’t manage to remove them all. I’m sure I’ll be digging them out for several years to come.

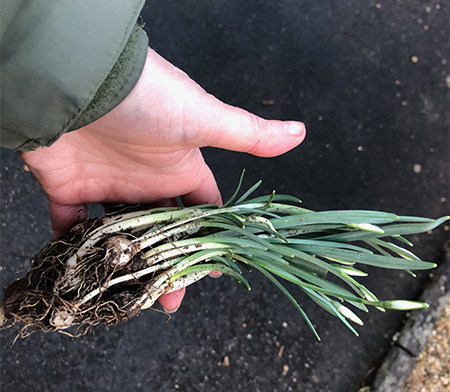
Bluebell bulbs
Spanish bluebell bulbs of varying sizes

Tips for gardeners

  • Ideally, plant native English bluebells rather than Spanish bluebells. They grow best in free-draining soil in partial shade.
  • Buy English bluebell bulbs from reputable sources to ensure they have not been sourced from the wild.
  • Don’t plant Spanish bluebells if you live near woodland where English bluebells are growing.
  • Cut off seed heads of Spanish bluebells after flowering to stop the windborne spread of seeds outside the garden.
  • Dispose of Spanish bluebell bulbs responsibly in council garden waste collections so they don’t end up somewhere they shouldn’t be.
Bluebell seed heads
Cut off the seed heads of Spanish bluebells to prevent them spreading

Tips for walkers

  • Be aware of the law. English bluebells are a protected species, which means it is illegal to pick, uproot or damage them.
  • Stick to designated paths through woods and avoid trampling bluebells. They can take years to recover from damaging footfall.

Where to see bluebells

Both the National Trust and Woodland Trust have lots of information on where to see bluebells. If you have any recommendations for bluebell walks let me know.

A carpet of bluebells, in Strid Wood, Bolton Abbey
A carpet of bluebells in Strid Wood, Bolton Abbey, Yorkshire

Potatoes: a whole new language

A lot of gardeners have Easter marked as the time to start planting their potatoes. I guess it’s the prospect of a long weekend in the garden or on the allotment that turns our thoughts to planting spuds.

But before you start digging, do you know your ‘first earlies’ from your ‘maincrops’? Have you heard of ‘indeterminates’ and ‘determinates’? What are ‘seed potatoes’ and do you need to ‘chit’ them? Yes, the humble potato (Solanum tuberosum) comes with a language all of its own.

Freshly harvested potatoes

Seed potatoes

Seed potatoes are potatoes from last year’s harvest that you grow this year’s potatoes from. It’s fine to use a few tubers from your previous crop if they have stored well over winter and look healthy. However, using potatoes from your own crops year after year runs the risk of carrying over any disease that might be present. With that in mind, it is also important not to grow potatoes in the same soil each year, as pests and diseases are likely to build up.

In general, it’s best to use a fresh stock of seed potatoes from a garden centre or online catalogue. They will be virus free and guaranteed to give you a tasty, disease-free crop. There will also be plenty of varieties to choose from.

Potatoes chitting on a window sill
Seed potatoes guaranteed to be virus free

Although it is possible to grow potatoes from store-bought eating potatoes, you won’t get the same disease-free guarantee. If you decide to try this, make sure you buy organic as some eating potatoes are treated with a chemical that prevents sprouting.

First earlies, second earlies and maincrop potatoes

These terms simply relate to the time when you plant and harvest your potatoes. First and second earlies (new potatoes) are often planted at the same time, with second earlies being ready for harvesting a few weeks later than first earlies. Maincrop potatoes are generally planted a bit later, take longer to grow and are harvested later in the year.

When to plant potatoes

There is no hard and fast rule for when you should plant potatoes. It will depend on the temperatures in your region. Later planting (up to a couple of weeks before your last frosts) simply means later harvests, so don’t panic if you can’t start planting over the Easter weekend! As a very general guide…

First earlies can be planted around the end of March/early April for harvesting 10–12 weeks later in June/July. They are the earliest to crop, hence the name ‘first early’. Popular varieties of first early potatoes include:

  • Arran Pilot
  • Duke of York
  • Foremost
  • Orla
  • Pentland Javelin
  • Rocket
  • Sharpes Express
  • Swift

Second earlies can be planted in mid-April for harvests 14–16 weeks later from July onwards. Popular varieties of second early potatoes include:

  • Charlotte
  • Estima
  • Jazzy
  • Kestrel
  • Maris Peer
  • Ratte

Both first and second earlies tend to be small and flavoursome new potatoes, ideal for boiling and steaming. They are best eaten soon after harvest.

Main crop potatoes can be planted in mid- to late-April for harvesting after 15–20 weeks from late August onwards. Popular main crop varieties include:

  • Cara
  • Desiree
  • King Edward
  • Maris Piper
  • Navan
  • Pink Fir Apple

Maincrop potatoes tend to be bigger than first and second earlies and can be baked, roasted or fried. They also store well over winter.

Chitting

Chitting is the process of forcing seed potatoes to start sprouting a few weeks before they are planted out (see How to chit potatoes). Left in a cool dry place in the light, the ‘eyes’ of seed potatoes produce stubby sprouts called ‘stolons’. When planted below ground, the stolons grow upwards to create the new potato plant.

Chitted potatoes, ready to plant
Chitted and ready to plant

Chitting is a good way of getting early varieties off to a head start so that they get growing quickly when they are planted, but it isn’t essential.

Indeterminate versus determinate potatoes

I only discovered these terms a few weeks ago and they will completely change the way I grow my potatoes this year, as indeterminate and determinate potatoes have different growth habits.

Indeterminate potatoes produce their crop at intervals along the growing stem in multiple layers. As the plant grows up you need to keep covering the stem (‘earthing up’) so that the layers of potatoes remain underground. You need vertical space for this type of potato and they take longer to grow than determinate varieties. Most (but not all) maincrop potatoes are indeterminate.

Determinate potatoes grow in a single layer just below the seed potato in the top layer of soil. They will benefit from a layer of mulch as they grow to ensure any tubers that break through the surface are protected from the light. The plants do not grow very tall and flower earlier than indeterminate varieties. Most (but not all) early varieties are determinate.

Growing potatoes in containers

With limited veg-growing space, I’ve always grown my potatoes in sacks. For years I’ve been planting 2 or 3 potatoes deep in each sack and ‘earthing up’ around the stems as they grow, thinking that they are growing layers of potatoes. But it turns out that most of the varieties I’ve been growing are ‘determinate’ and have therefore been growing in a single layer. So, this year, I will still plant them in sacks, but I will plant 2 seed potatoes in the bottom third of the sack, then another 2 in the next third. In theory, I should get double the harvest in the same space. Result!

Potato sacks in leaf
Sacks of potatoes

Whatever type or variety of potato you decide to grow, and whether you chit or not, there is nothing more satisfying than harvesting flavoursome home-grown potatoes.

Homegrown Charlotte potatoes

So let me know what you’re growing this year and any potato-growing tips you want to share.

How to choose the right Mahonia

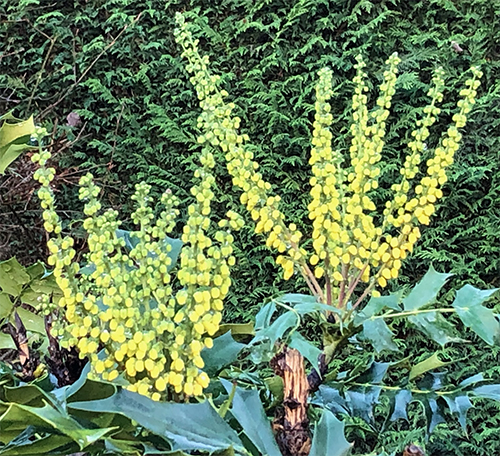
Mahonias are fantastic evergreen plants, with clusters or spikes (racemes) of scented yellow flowers that are rich in nectar and a magnet for foraging bees in winter. The different species of Mahonia come in a range of sizes to suit any garden type, and flower at different times from late autumn to early spring.

Mahonia in bud: a rich supply of nectar through the winter months
Mahonia in flower: a rich supply of nectar in December in my garden

Mahonia or Berberis?

Mahonias are members of the Barberry family (Berberidacae). However, botanists haven’t completely agreed on the nomenclature. Don’t be confused (as I was) if you see the same plant with two different names: Berberis and Mahonia. Mahonia aquifolium is also sometimes known by its common name of Oregon grape (Oregon adopted it as its official state flower in 1899) .

Best features of Mahonia

Mahonias tend to be planted for their bold architectural foliage. Most Mahonias are large shrubs with rows of glossy, deep green, spine-toothed leaves. However, there is a variety called Mahonia eurybracteata ‘Soft Caress’ that has spine-free foliage if you are looking for something softer.

The biggest delight is the characteristic clusters of scented yellow flowers. These are followed by pretty purply-blue berries.

Mahonias tolerate all types of well-drained soil, and will thrive in sun or shade. This makes them a good choice for ‘problem’ areas of the garden. Most are fully hardy, down to –15oC.

Mahonia berries

Key factors when choosing a Mahonia

To find the right Mahonia for your garden it is worth considering both size and flowering time. Although there are about 70 species of Mahonia, a few key varieties tend to be sold by garden centres or online retailers in the UK.

Mahonia x media ‘Winter Sun’, ‘Charity’ and ‘Lionel Fortescue’ can grow to 2.5–4 metres in height, although they can taken 10–20 years to reach their ultimate size. Being large upright shrubs, these varieties are ideal as a focal point at the back of a border. Sometimes they are used as hedging. They tend to flower between late November and early January.

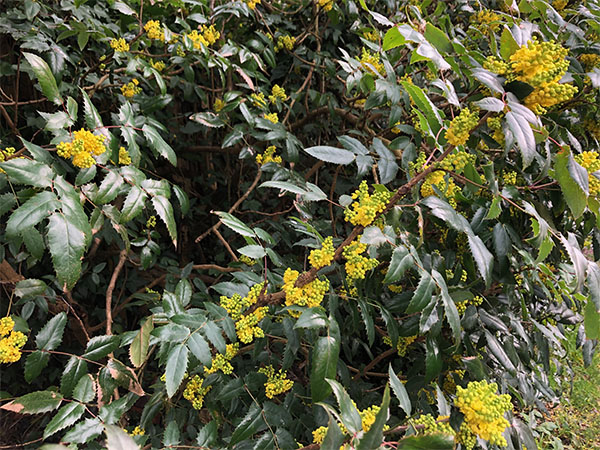
Mahonia japonica is smaller than the ‘Media’ varieties, but is another erect shrub that can grow to 1.5–2 metres in height. It also flowers between the end of November and March.

Mahonia japonica in a border of mixed shrubs at the bottom of my garden

Mahonia aquifolium ‘Apollo’ is a more compact variety that grows in a low spreading dome. It reaches about 1 metre in height and spreads to about 1.5 metres.

Mahonia aquifolium 'Apollo' shrub
Mahonia aquifolium ‘Apollo’

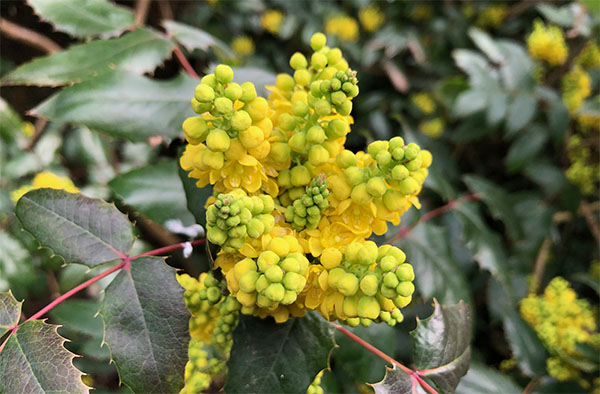
I pass this one on my daily dog walk. It has been bursting with compact clusters of intensely scented flowers all through February. It is thriving in a sheltered walkway next to a fence where it gets both sun and shade.

Highly scented flowers of Mahonia aquifolium 'Apollo'
Intensely scented flowers of Mahonia aquifolium ‘Apollo’

Mahonia repens has a low, creeping habit, with a height of 30–50cm and spread of 1 metre. It is ideal for shady ground cover, at the front of a border, or to cover a bank. This variety flowers in mid to late Spring (April/May).

Planting Mahonia

March is a good time to plant Mahonias. Make sure you choose a spot where your variety of choice has enough room to grow. I initially planted my Mahonia japonica too close to a conifer hedge and had to move it (see Mahonia on the Move). Dig a hole that is twice the size of the root ball. Plant the Mahonia with some well-rotted compost and firm it in well before giving it a good soak.

Mahonia care

Mahonias are low maintenance plants. They have low nutrient requirements, but like most shrubs will appreciate a mulch in early spring and/or autumn. This will also help to suppress weeds around the base. They can tolerate relatively dry conditions, so they only need watering in times of drought.

Pruning. Thankfully, pruning can be kept to a minimum, not least because the holly-like leaves can make it an uncomfortable process. In fact, you don’t need to prune a Mahonia at all unless your shrub loses its shape or gets too leggy.

If you do need to prune, make sure you are wearing a sturdy pair of gardening gloves. After flowering, remove any dead or diseased branches, or any branches that are growing out at an awkward angle or crossing with other branches.

If your Mahonia has become bare at the base, you can give it a hard prune by cutting a third of the branches down to about 15 cm (6 inches) from ground level. It will look a bit sorry for itself for a while, but this will help to generate fresh growth from the base.

To make plants bushier, cut back branches by 30–50%, which will stimulate the production of side shoots.

Avoiding disease. In general, Mahonias remain pest and disease free. Powdery mildew and rust are potential problems though. To help avoid these, make sure you water at the base of the plant and not on the leaves, regularly remove dead leaves and material from around the plant, and prune out a few central branches to let air circulate through the plant. Remove any affected leaves as soon as the problem appears so that it does not spread to the rest of the plant.

Go get a Mahonia

In summary, a Mahonia will add winter colour and nectar to your garden, will grow pretty much anywhere, and will be relatively low maintenance. So, if you have the room, I highly recommend you go out and get a Mahonia.

Love letter to my garden

Happy Valentine’s Day, Dear Garden,

I woke up this morning feeling a little down. It was raining (again) and the world outside seemed very grey, both in colour and spirit. I came downstairs to make a cup of tea and gazed through the rain-splattered windows.

More rain…

And there you were, as always, waiting for me. No judgement, no agenda. Always changing, yet ever familiar. Ready to put a smile on my face.

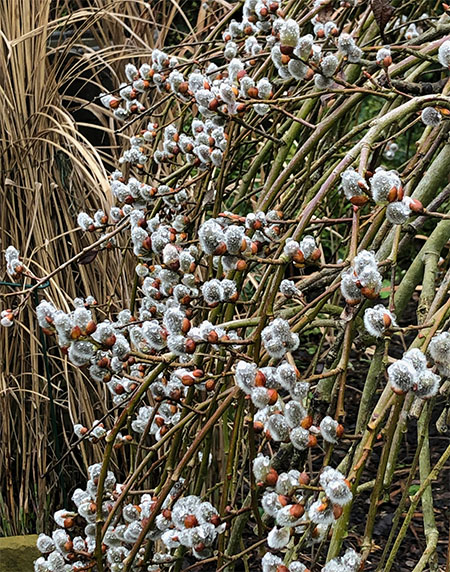
Even on this murkiest of murky days, I see borders dotted with vibrant green shoots, a willow tree smothered in fluffy silver catkins…

Raindrop-bejewelled willow catkins

…clumps of pure white snowdrop brilliance, and the gently nodding pastel heads of self-seeded Hellebores.

Christmas roses trump red roses today

I’m sorry I’ve neglected you these past few months. You’ve been too frozen or too soggy for me to apply any meaningful care, and now you eagerly await the removal of winter’s debris and carpets of perennial weeds.

Soon, my love. Very soon. I promise!

You have put up with so much: the pruning that I get wrong, the staking that I forget to do, and of course the impulse buys that move around your borders until they find the perfect home.

You have given so much: an ever-changing tapestry of colour and form…

A constantly changing tableau

…a home to countless creatures (with new surprise residents every year)…

Female sparrowhawk
Female sparrowhawk

…the delight of tasty home-grown produce (even at the end of winter, you have leeks and beetroots to offer for the pot)…

Bedraggled but tasty leeks and beetroot

…sweet exotic scents on warm summer evenings, and the sparkling artistry of frozen cobwebs and frosted seed heads in winter.

A frosty cobweb

You have taught me so much too. Not just newfound practical skills, but the importance of planning, greater appreciation of the changing seasons, and a better understanding of the life that flits above your canopies and crawls within your hidden spaces.

You have helped me with the things I find most difficult. How to focus on one thing at a time, to let go of perfectionism and live in the moment…

The garden will never be perfect – but that’s OK!

…and to be more patient. All still a work in progress, but you are a tolerant and forgiving teacher.

So, thank you, dear friend for helping me find an inner calm… for keeping me healthy…for getting me just a little bit dirty every now and then…for getting me outside in the fresh air, away from my desk…for encouraging me to be creative…for reminding me of the wonders of Creation…and for bringing me so much joy.

You are, and always will be, my happy place!

Gardening-in-rain
Out in my happy place, whatever the weather

With love, always xx

Hidden Hellebores

March may be filled with the sunny glow of the daffodil, but it has a loyal compatriot in the tough, cold-hardy Hellebore. These harbingers of Spring thrive side-by-side in the flower borders around my pond, and together with the early-evening song of a vociferous blackbird, they mark the turning of the season.

A perfect combo – hellebores and daffodils

A perfect combo – Hellebores and daffodils

Hellebores have a demure charm, with gently nodding heads that hide their true glory. But the blooms can become hidden among the large saw-toothed leathery leaves, which turn an unsightly crispy brown as they age. 

Remove old leaves from Hellebores to reveal the blooms

Old leaves on Hellebores turn brown and crispy as they age

Remove old leaves

So remove the old leaves now, if you haven’t done so already. This will give pollinators better access to the flower heads and reduce the likelihood of Hellebore leaf spot, a fungal disease that pock marks the flowers with black spots.

Hellebore leaf spot is caused by the fungus Microsphaeropsis hellebori

Hellebore leaf spot is caused by the fungus Microsphaeropsis hellebori

If, like me, you already have this problem on some of your plants, then the only solution is to remove and destroy all the infected leaves and blooms (there is no chemical solution). If you leave infected material around the plant, it will be a source of repeat infection next year.

So give your Hellebores a tidy up early in the season (it’s an easy #15greenmins job) and enjoy their magnificence.

The glory of Hellebores revealed

The glory of Hellebores revealed

Hellebores favour a humous-rich soil in shade or part-shade with good drainage, but I’ve found they flourish in full sun as well. With hundreds to choose from, including double blooms and freckled varieties, if you don’t have a Hellebore in your garden yet, get one! I guarantee you’ll be hooked.

Persevering with snowdrops: planting in the green

A few years ago there weren’t any snowdrops in my garden. I started by planting some dry bulbs in autumn, but when they failed to emerge the following year I did my research and began to plant snowdrops ‘in the green’ in the hope that one day I would have a dazzling display, the envy of every galanthophile.

I’ve planted a few clumps every year for about 5 years now and, to be honest, it’s still a battle to get them to grow. They certainly haven’t spread into the carpets of snowdrops that I long for.

Carpet of snowdrops in churchyard
The vision: a carpet of snowdrops (but without the headstones)

Although the individual clumps have got bigger.

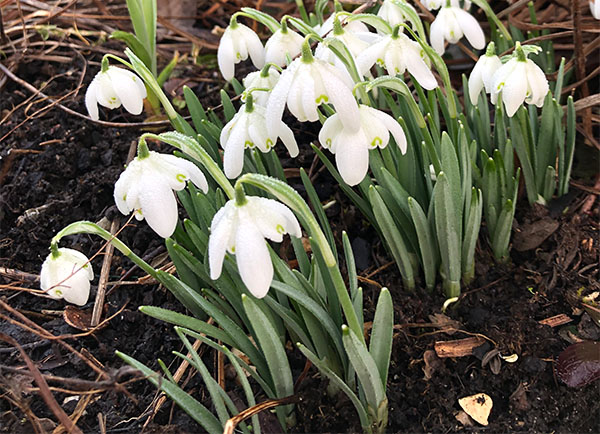
A decent-sized clump of snowdrops

Drying out

I expect this is because the foundation of my soil is clay. Despite all the organic material I add, it has a tendency to dry out in dry summers – and we’ve certainly had a few dry summers! Unlike daffodils and tulips, snowdrop bulbs do not have a water-retaining skin, so they dry out very quickly. And a dry snowdrop bulb is a dead snowdrop bulb. So, thinking about, I should just be grateful I’ve got any snowdrops after last summer’s soaring temperatures.

But I keep persevering, as nothing else in the garden puts a smile on my face in January and February quite like a bunch of snowdrops does. And I have a few decent clumps dotted around the garden now.
I'll keep planting snowdrops in the green, because every clump that surfaces the following year is so worth it
I’ll keep planting snowdrops in the green, because every clump that surfaces the following year is so worth it

Curbside snowdrops

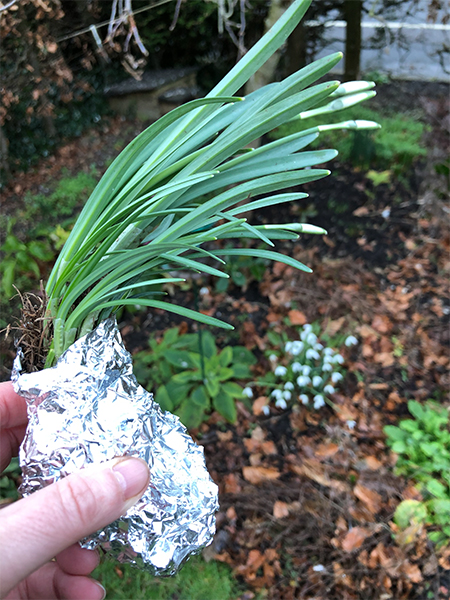
This week, I handed over another tenner at my local garden centre for 3 more bunches of snowdrops in the green.

You can buy snowdrops in the green from garden centres, or order them online

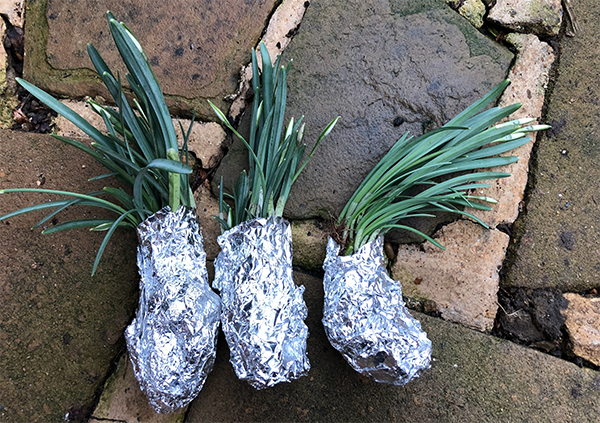
I split each clump down into three smaller clumps…

Planting snowdrops in the green

And dotted them under the hedge along the curbside in the front garden.

Plant snowdrops in the green and water well

They’ve got quite a few buds on them, so I might even get a few flowers this year.

So, I will keep persevering with snowdrops. How can I resist?!

Clump of snowdrops
Guaranteed to put a smile on my face

Are you having success with snowdrops? If so, I’d welcome any tips!

Can you plant spring bulbs in January?

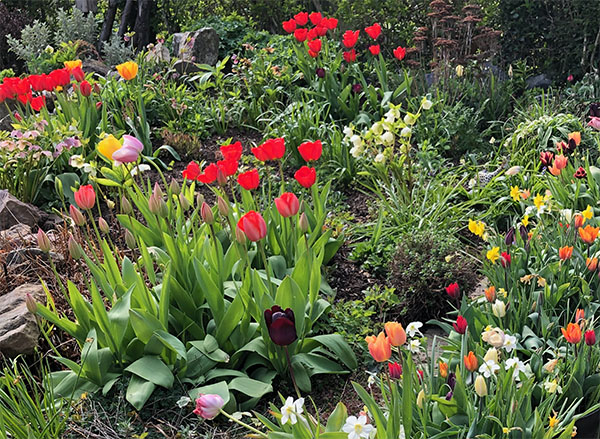
The quick answer is yes (well, daffodils and tulips, at least). I always plant spring bulbs in my patio pots later than recommended, mostly because I can’t plant them until I’ve lifted my dahlias out. Last year, the dahlias were still flowering in early November, which pushed my timings even later than usual.

So here I am in the middle of January, with bags of bulbs in the shed still. In general, spring bulbs are incredibly resilient, but they need at least 6 weeks of wintry weather to put their roots down before flowering. Planting them now means that they should still grow but they will flower later than usual.

This is definitely the case for tulips and daffodils. I have planted them in January before and still got a decent display in mid to late spring. A few of the daffodils may come up ‘blind’ though (foliage but no flowers). Also, the daffodils and tulips may well bloom at the same time.

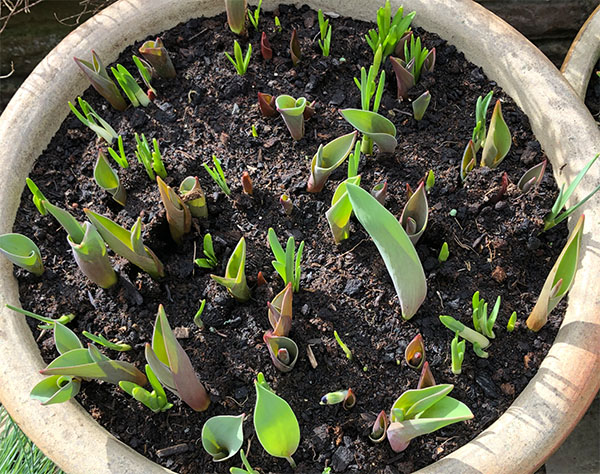
Spring bulbs starting to emerge
Daffodils and tulips may emerge at the same time…
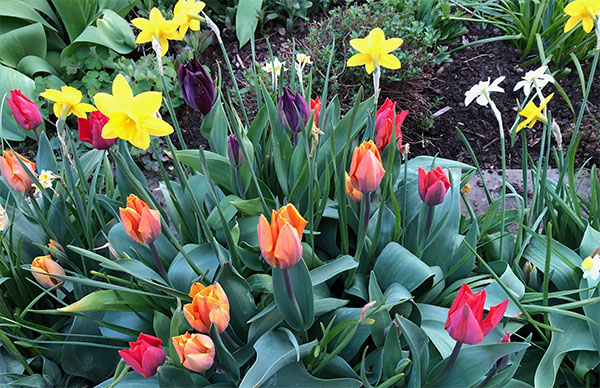
Daffodils flowering at the same time as tulips
…and flower at the same time

The jury is out on irises. It may well be too late to plant them, as they often start flowering in February, but seeing as I’ve got them I might as well plant them and see what happens. They’re certainly not going to flower in the shed.

Iris reticulata
Iris reticulata: a gorgeously uplifting flower in February

Check your bulbs

Before planting, make sure your bulbs are firm. Discard any that have gone soft or mouldy. If there’s just a bit of mould on the outside, and it hasn’t affected the firmness of the bulb, scrub it off with a hard-bristled brush. If the bulbs have started to sprout, be careful not to damage the growing tips when you plant them.

Layering bulbs in pots

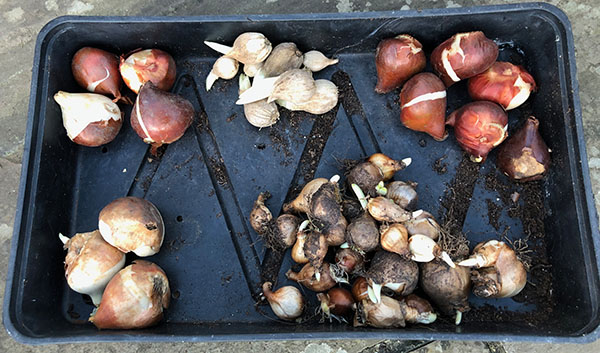
By layering spring bulbs in pots – see Bulb lasagne – you can get a display that lasts for several months. First, I work out which bulbs I am going to plant in each pot.

Selection of different spring bulbs to  layer in a pot
A selection of spring bulbs to layer in a pot

Tulips bulbs should be planted first, at about 8 inches (20 cm) deep. I use peat-free compost, with a little grit mixed in to improve the drainage. This year I’ve planted a mix of 3 varieties: Prinses Irene, Havran and Couleur Cardinal).

Tulip bulbs planted in a pot 8 inches deep
Layer 1: Tulip bulbs, planted about 8 inches (20 cm) deep

Cover the tulip bulbs with a 2-inch (5 cm) layer of compost, and then plant a layer of daffodil bulbs about 6 inches (15 cm) deep. I’ve got a mix of narcissi bulbs that I lifted and stored last year, but I lost the labels so it will be interesting to see what comes up.

Mixed daffodil bulbs planted in a pot about 6 inches deep
Layer 2: Mixed daffodil bulbs, planted about 6 inches (15 cm) deep

Cover the daffodil bulbs with another 2-inch (5 cm) layer of compost, and then plant iris reticulata 4 inches (10 cm) deep.

Bulb lasagne, layer 3, dwarf irises
Layer 3: dwarf irises, planted near the top of the pot

Finish off with a final layer of compost.

Late planting works for tulips

December/January is a particularly good time to plant tulip bulbs. If you plant them too early and they sit in warm, wet conditions they are susceptible to fungal diseases, particularly something called ‘tulip fire’. The leaves become withered and distorted and are covered in brown spots. In the past few years, I have never planted tulips before December and it seems to work well.

Pick up a bargain and get planting

By planting slightly later than the ‘the norm’, you may even be able to pick up a bargain load of bulbs, as online retailers and garden centres will be looking to clear their stocks. So, as soon as the ground defrosts (!), get those bulbs in. Don’t forget to share your results.

It's worth planting those spring bulbs, even in January: bloomin' lovely
It’s worth planting bulbs, even in January, for lovely displays of spring colour

How to chase the January gardening blues away

It’s raining – again! I know I shouldn’t complain, especially after the hot dry summer we had last year, but there are jobs in the garden that are starting to get a bit desperate (I’ve still got spring bulbs to plant!) and I can’t get near them without creating a big muddy mess.

Rainy day in January
Stuck inside on another wet and windy day

So, what can we do on the days when the weather completely stops us from stepping outside? For me, it’s all about the dreaming and planning – places to go, people to see, and how I would like this year’s garden to look.

‘Wish list’ plants

If you’re a plantaholic like me, you’ve probably got a long list of botanical beauties you would like to introduce to your garden. My wish list has a tendency to grow a little longer each time a plant catalogue drops through the door and after every episode of Gardener’s World! But I’ve also got to be realistic – there’s only so much room out there, so if I’m going to buy something new I need to know where I’m going to put it.

Packed garden borders
There’s always room for one more plant, right? Erm, maybe.

Top of my wish list for a while now has been a crab apple tree. They are often cited as ideal compact trees for small gardens, providing year-round interest with their colourful blossom, fruits and foliage. Nevertheless, I haven’t had the space…until now. At the end of last year we removed a large conifer hedge from one side of the garden, which may have opened up a potential spot.

It means I can now start researching crab apples again. There’s a terrific review on Gardens Illustrated of the best crab apple trees for colour and form by plant expert Graham Rice. I’ll let you know if I manage to squeeze one in!

Sowing and growing

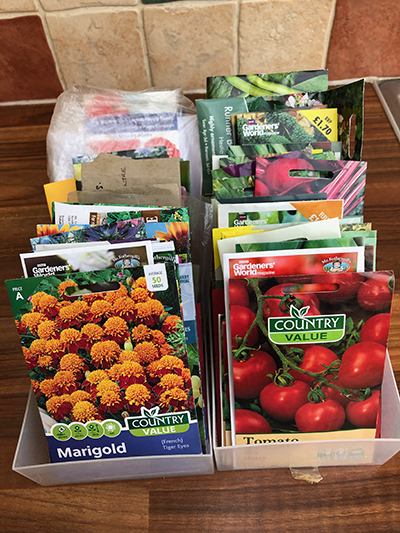
Wet and windy days provide a great opportunity for sorting through those seed packets and working out what you’re going to grow this year. Make a plan of what you would like to grow from seed, what month you need to sow it, and where you are going to grow it. There’s oodles of advice online to help with this.

Organized seed packets
Check what seeds you’ve already got before buying more

I always tend to get sidetracked with my herbaceous borders, but I’m hoping to try to focus more on the vegetable plot this year and widen my veg-growing horizons beyond tomatoes, courgettes and potatoes. Watch this space!

Places to visit

Some of the best inspiration comes from visiting other gardens. Last year, I visited two gardens in West Sussex: Nymans and the Sussex Prairie Garden. It was a fabulous day out, and the awesome summer borders in both gardens gave me lots of ideas for planting combinations.

So, while I’m stuck indoors I’m making a list of gardens close to home to nurture my botanical soul in 2023. I’ve already found a few gems that I wasn’t previously aware of. Check out the Great British Gardens website for some inspiration near you!

Adapting plans from lessons learned

It’s all very well making plans for the rest of the year, but it’s also good to reflect on what did and didn’t work last year. Given the incredibly dry summer we had, I am seriously considering not planting hanging baskets this year. They needed constant watering, which was unfair on my kind neighbour when I was away.

I am also considering swapping growbags for larger pots to grow my tomatoes in this year. Growbags have worked wonderfully up to now, but they often needed watering twice a day through July and August last summer, and if hot summers become a trend then that’s not sustainable.

Keep dreaming

Whatever you are dreaming of, or planning for, this year, enjoy the process. I’ve just noticed the rain has stopped…so I’m heading out into the garden to see what I can tick off my January checklist.

2022 End of year review

The weather in the UK is always unpredictable – that’s why talking about it is a national pastime – but this year it has given us gardeners a rollercoaster of issues to contend with. My village in the South of England made the news twice in 2022 with some of the driest and wettest days on record.

January

It started with the warmest New Year’s Day since records began, with warm air from the Azores raising temperatures to a high of 16.3oC in central London. It was also the sunniest January on record in England, with the Met Office recording 80.7 hours of sunshine.

As we all (should) know by now, this general increase in temperature is concerning, but on the plus side it meant that my snowdrops, aconites and crocuses were all in bloom by the end of the month.

February

February was mild too, but brought a cluster of three named storms – Dudley, Eunice and Franklin – which wreaked havoc across the UK. Storm Eunice had the biggest impact in the south of England, bringing down trees, greenhouses and fences, and leaving lots of homes without power.

It brought down part of the conifer hedge that runs the length of my garden, as well as most of the mistletoe in the local cemetery. A lot of the lovely cherry blossom that had started to emerge didn’t hang around for long either, unable to to withstand the gusty weather.

March

In early March, landmarks across the world were illuminated in yellow and blue to reflect our solidarity with the people of Ukraine who were, and still are, in an unimaginable situation. Ablaze with daffodils and irises, the garden seemed to echo this sentiment.

After all the wind and rain, I managed to start a Spring tidy up, revealing a colourful collection of hellebores.

April

The borders slowly started to take shape this month, but it was an ongoing battle between me and the weeds, particularly with ground elder. I will keep digging it out, and eventually I will be victorious!

By the end of the month, the garden was looking pretty good, with tulips taking centre stage.

May

First broods of robins and blue tits both fledged successfully this month, we started to see evidence of hedgehogs, and we were visited by a host of butterflies and bees enjoying the pollinator-friendly planting.

I continued to do battle with the weeds though.

The sowing and growing continued.

Meanwhile, the shrubbery at the bottom of the garden started to get leafy and lush (there’s a husband in there somewhere!).

June

I managed to get most of the plants that I had grown from seed, plug plants or cuttings planted out this month.

With longer days and warmer evenings we started to sit outside later into the evening, enjoying some al fresco meals, so I gave the ‘dining area’ a bit of a makeover, and added some new lights.

It was a month of celebration, with an extra bank holiday and street parties to celebrate the Queen’s Platinum Jubilee.

July

The warm dry spell became a hot dry spell, and we were soon making headlines as the driest village in Britain, with no rainfall at all in July.

The garden was at its flowering peak, and watering became a full-time occupation.

August

As temperatures continued to soar, parts of southern, central and Eastern England officially moved to drought status, and hosepipe bans were introduced in some regions. The watering marathon continued.

On the up side, I started to harvest my tomatoes 4–6 weeks earlier than usual, and began enjoying meals of home-grown deliciousness.

There were also plenty of early, albeit smaller than usual, blackberries to forage in the hedgerows.

September

This month was a sombre one, with the passing of Her Majesty Queen Elizabeth II. A constant in so many of our lives, it hit a lot of us harder than we thought it would, and the nation went into an extended period of respectful mourning.

Life in the garden went on though, with some of my favourite plants starting to go to seed, ready for collection.

October

The hot dry weather had taken its toll on some of the shrubs and hedges. We’d been talking about it all year, and finally decided to remove the stressed and straggly conifer hedge bordering our neighbours’ garden, leaving us with some exciting planning for that area in 2023.

I harvested the last of the summer vegetables (peppers, chillis and aubergines), and picked the last of the tomatoes – red and green – to make chutneys and soups.

And the first frost arrived.

November

In November, we made the news again; this time, as the wettest village in Britain with the most rainfall in England falling in one night.

With some decent rainfall, many of the perennials that had struggled during the hot summer had a second flush of flowers.

But the lawn and borders soon became sodden, and mushrooms flourished.

December

December ended a long run of above-average temperatures, with a prolonged period of freezing conditions.

Even the cobwebs froze and, on several days, we experienced a beautiful hoar frost (crystalline deposits of water vapour).

The Met Office has confirmed that 2022 has been the warmest year in the UK since records began, with every month except December being warmer than average. As gardeners we are the first to see how earlier springs, warmer summers and extreme weather events are affecting plants and wildlife, and there is no doubt that we will have to adapt how we garden in the future.

For now, let’s watch this space and keep talking about what we can each do at a garden level.

All that remains of 2022 is for me to wish you all a very Happy New Year!

#15greenmins

A poinsettia is not just for Christmas

There’s a good chance you’ve bought a poinsettia for Christmas, either for yourself as a must-have addition to your Yuletide decorating, or for a friend or family member as a gift to brighten their day. Florists, garden centres and supermarkets are full of them in the run up to Christmas, and most of us can’t resist buying one.

Poinsettias are the perfect addition to Christmas decorations

Unfortunately, they have a bit of a reputation of being hard to care for – I have a friend who is delighted if hers lasts a week!

But follow 3 simple rules and your poinsettia should thrive through Christmas, and beyond.

  1. Keep it warm and out of draughts
  2. Give it bright light (but not direct sunlight)
  3. Keep the soil moist, but don’t overwater it!

What is a poinsettia?

The poinsettia (Euphorbia pulcherrima) is a member of the spurge family. It is native to Mexico and parts of central America, where it grows as a perennial shrub, reaching heights of 10–12 feet. Cuttings from the native plant were sent to the USA in 1828 by the first US Ambassador to Mexico, physician and botanist Joel Roberts Poinsett, and they have been widely cultivated across the globe ever since.

Poinsettias grown as shrubs or trees in their native Mexico
Poinsettias grow as shrubs or trees in Mexico

Poinsettias have small yellow flowers at the centre of showy coloured bracts (leaves). There are now over 100 cultivated varieties with various coloured bracts, including white, pink and marbled, but the red poinsettia remains the most popular choice in the UK at Christmas.

Poinsettia care: 3 top tips

Keep it warm and out of draughts. Poinsettias like a constant warm temperature of 15–22oC. Many shops put the plants near their doorways to tempt you to buy them on the way in or out, but this is the worst possible place for them in the UK, because fluctuations in temperature below 12oC (i.e. every time the door opens) will stress the plant; as a result, it will start to drop its leaves. This may well be the reason why so many plants struggle once you have brought them home, as they’ve already been stressed in the shop.

At home, you can put your plant near a radiator but make sure you keep it away from draughty areas like doorways, open windows and fireplaces.

Poinsettias also prefer humid conditions, so if you are keeping your plant in a very warm place, it is a good idea to mist it with water from time to time.

Give it bright but indirect light. Poinsettias prefer light to shady conditions, but direct sunlight can scorch the leaves. This shouldn’t be a problem in winter, but don’t put the plant on a south-facing windowsill in summer.

Where to place a poinsettia
This poinsettia did well in a south-facing position in my conservatory, but had to be moved later in the year away from direct sunlight

Keep the soil moist but not overwatered. Poinsettias do not like a lot of water. Try not to let the root ball dry out completely, but it is even worse to leave the plant sitting in water. If you do, the roots will rot and you’ll end up with a dead plant.

A wilting poinsettia is a sign of a draughty location or too much or too little water

If you’re not sure how much water to give your plant, I’d lean towards it being too dry. It seems to work for me. I wait until the top layer of soil has dried out before giving it a small amount of water, making sure that there is no excess water at the bottom of the pot.

Check the leaves regularly – if they are starting to curl or wilt, or they are dropping off, then you will need to adjust your watering regimen.

I’ve read that poinsettias prefer ‘soft’, warm water, but mine gets water out of the tap (which is both hard and cold), and it hasn’t seemed to do it any harm.

Poinsettia care after Christmas

Sadly, once poinsettias start to lose their colour towards the end of January, most are resigned to the rubbish or compost bin.

They don’t have to be thrown away though. They make a lovely house plant for the rest of the year and, with a bit of special attention, can be coaxed into turning red again in time for next Christmas.

My poinsettia from Christmas 2021

Here are a few tips to help your poinsettia thrive.

  • Continue providing it with appropriate warmth, light and water (as above).
  • In spring (April), reshape the plant by cutting the stems back to 4–6 inches; be careful to avoid the milky sap that will ooze from the cut stems, as it can cause skin irritation.
  • When new growth starts to appear, feed the plant monthly with a high potassium fertiliser, such as tomato feed.
  • As the plant grows, repot it into a bigger pot using a decent compost that provides good drainage; adding grit to the compost can help with drainage.

How to turn the leaves red in time for next Christmas

The bracts turn red by a process called photoperiodism, which means that they need a short day length (less than 12 hours of light) for about 8–10 weeks. The easiest way to reduce your plant’s exposure to light is to keep the poinsettia in a room that gets no artificial light from September onwards.

If that’s not possible, place your plant in the dark for about 14 hours every day (6pm to 8am), either in a warm cupboard or by blocking out the light with a cover. Make sure it gets a normal amount of light for the remaining 8 hours a day.

I gave this a go for a couple of weeks in early December, and the bracts did start to turn red. I didn’t start the process early enough this year, so I’m going to try again next year from September onwards.

How to turn your poinsettia leaves red in time for Christmas
My efforts to turn the leaves red this year started to work…I need to start the process earlier next year

#PoinsettiaChallenge2023

So, here’s my challenge. Don’t throw out this year’s poinsettia. Give it some TLC and join me in trying to keep it going through to Christmas 2023, and have a go at turning the leaves red again. Share your results on Facebook and Twitter using the hashtag above, and let’s see if we can give this year’s poinsettias a second chance of Christmas glory.

Protecting plants in winter

Although it’s bitterly cold, and forecast to get colder (–5oC or lower overnight), at least it has stopped raining and my lawn and borders are no longer squelching under foot. So, I’ve embraced the cold dry weather to get a few garden essentials done.

Getting out in the garden, even for just a few minutes at a time, has lifted my spirits immensely … although sometimes I’ve not been able to feel my fingers or toes (brrr!).

Get outside in winter
Wrap up warm and get outside. Even a few minutes in the garden can help to lift your mood.

Covering plants with fleece

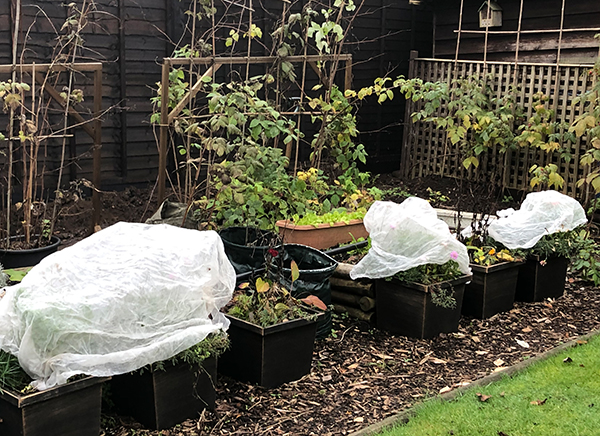
My number 1 job has been to protect several half-hardy or tender plants from the looming cold snap. As a result, the garden is now dotted with ghostly misshapen humps of horticultural fleece, covering pots of African daisies (osteospermums) and blanket flowers (Galliardia).

Cover plants with horticultural fleece to protect them from frost
Cover tender plants with horticultural fleece to protect them from frost

Meanwhile, my husband has done a fabulous job of wrapping up the tree fern. The crown is the key to future fronds, so he’s made sure that’s well protected with a ball of fleece, and he’s protected the trunk with some old carpet.

A well-wrapped tree fern

You can buy horticultural or ‘garden fleece’ in sheets or rolls, or many garden centres will trim off the amount you need from large rolls of the fabric.

It tends to be very light weight (usually 17g or 30g per square metre), so make sure you secure the fleece with twine or pegs, or anchor the edges down with large stones, so that it doesn’t blow away. Alternatively you can buy fleece ‘jackets’ with drawstrings or zips, which you can secure over individual plants.

Secure fleece from blowing away

Fleece allows light and water to pass through it, so you can leave it in place for a few days, but remove it once the threat of frost has passed, as it reduces the amount of light getting to the plant and creates a microenvironment around the plant that is ideal for pests.

Eco-friendly alternatives. It is worth noting that horticultural fleece is made of polypropylene, a single-use plastic product that can’t be recycled. When it eventually starts to shred or go into holes it will, unfortunately, become plastic waste.

I’ve been reusing mine for years. I’ve even washed it. But when the time comes to replace it I will be looking for environmentally friendly alternatives – if anyone has any recommendations I’d love to hear them!

Providing permanent cover

Of course, the ultimate eco-friendly cover is glass. So, it’s ideal if you are able to move plants to a permanent greenhouse or cold frame. I don’t have much space to move plants under cover in the winter, but I’m able to store a few plants in my little pop-up greenhouse and cold frames in a sheltered alcove between the house and garage.

I’ve draped fleece over my prized abutilon ‘Kentish Belle’, which is still flowering, and moved it to a more sheltered spot under the kitchen window.

Abutilon 'Kentish Belle' has a long flowering season
Abutilon ‘Kentish Belle’ has a long flowering season and is hardy to -5oC, but I’ve found it needs a bit of protection over winter

Natural frost protection

As for the rest of my perennials and shrubs, they will have to contend with whatever this winter throws at them. I try not to buy too many tender plants as I don’t have the time to dig them up and protect them every winter.
As always though, I have left as much as possible of the previous season’s growth intact to protect the plant crowns beneath. This has the added benefit of looking quite spectacular when the frost does hit.

Last season's growth provides natural frost protection
Last season’s growth provides natural frost protection

How to use your autumn leaves

Autumn leaves

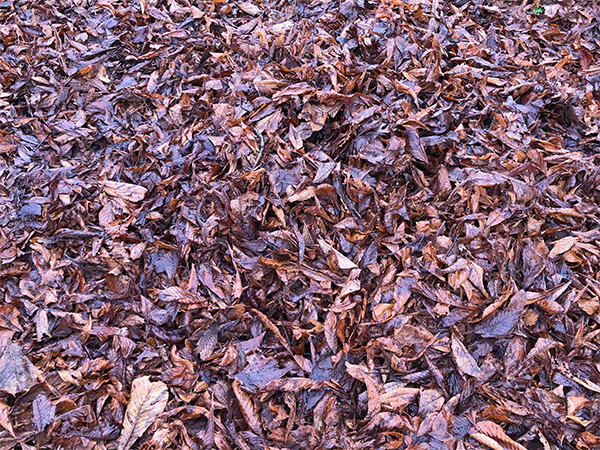
With all the wet and windy weather we’ve been having lately, the autumn leaves have been falling thick and fast, gathering in slick clumps on my patio, lawn and borders. It’s tempting to leave them be. After all, it’s the natural cycle of things, right? But there are good reasons to rake them up and recycle them in a different way.

First, they definitely need sweeping up from any hard landscaping, like paths or patios, mostly to prevent them from becoming slippy and dangerous, but also to stop them from blocking drains, which can cause flooding.

But what about the leaves on your lawn and borders?

Reasons to get raking

Too many leaves in one place will:

  • block sunlight and air from getting to your plants
  • trap moisture, enabling mould or disease to develop and/or causing the plants underneath to rot.

So, I rake them up and turn them into my own (free) soil improver that I can use when and where I want.

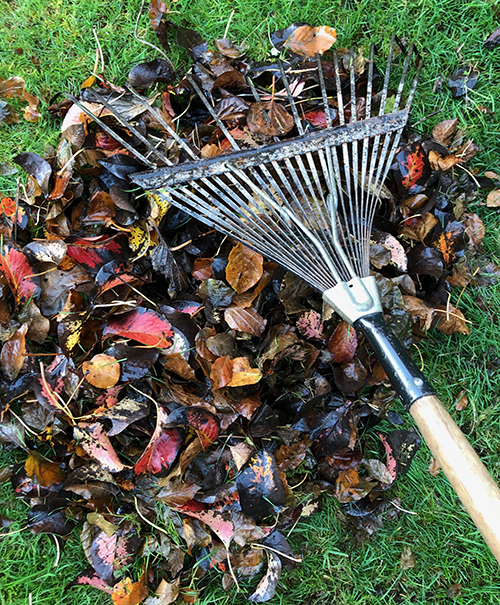
I’m not a big fan of leaf blowers. They’re noisy and use fuel. But fair enough if you’ve got a huge area and lots of leaves to clear. Given the size of my garden, my tool of choice is a sprung flat-tined garden rake. It does the job quietly and efficiently, plus raking is a fabulous way of burning calories. If I’m feeling a bit chilly, 5 minutes of raking is guaranteed to warm me up!

Raking leaves
A sprung flat-tined garden rake is my tool of choice

Composting

Most of the leaves that I collect end up in the compost bin. They are a terrific source of ‘brown material’ for the bin. If you don’t know what I mean by this, have a read of my blog post on Compost composition to get the the right ratio of ‘greens’ to ‘browns’.

Add leaves to your compost heap
Leaves are a great type of ‘brown’ material to add to your compost heap

Making leaf mulch

Another option is to make leaf mulch, which is really easy.

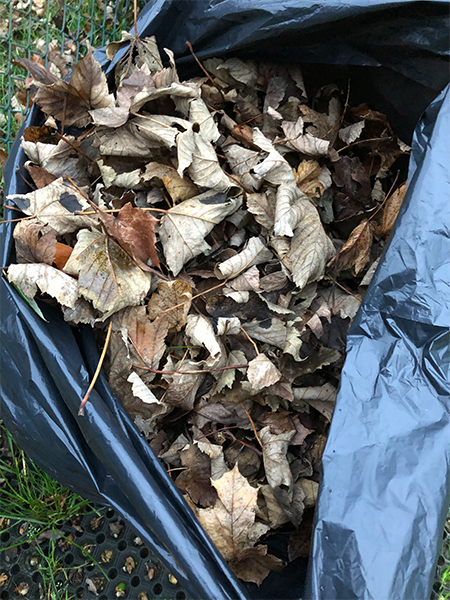
  1. Place the leaves in a black plastic bag.
  2. Give them a good soak (if not already wet).
  3. Puncture the bottom of the bag with a few holes for drainage.
  4. Tie the bag up and leave in a hidden corner of the garden.

The leaves will rot down into a nutritious mulch, ready for use in your borders next spring. IMPORTANT NOTE: make sure the leaves are wet before sequestering them away. I made the mistake of bagging up dry leaves the first time I tried this and nothing happened!

Dry leaves don't break down
Don’t bag up dry leaves – nothing will happen!!

The leaves are likely to break down quicker if you chop them up into smaller pieces before bagging them. You can do this by running a mower over them first, but only do this if they are dry or they will clog up your mower!

Wildlife-friendly leaf piles

Finally, leaf piles are fabulous for attracting wildlife to your garden. They provide shelter for all sorts of animals, such as small mammals, frogs and insects, and provide a good site or materials for hibernating hedgehogs. They are also a great source of food for birds, which will flick the leaves everywhere in search of grubs and insects.

Rake the leaves into a sheltered, quiet area of the garden, so that the leaves stay dry and don’t blow around everywhere, and you won’t disturb the residents.

Happy raking!